You have the option of creating receiver groups and assigning different receivers to them. In this guide you will learn how to create and edit receiver groups and how to select them during the import of new receivers. A practical example also shows you how receivers are divided into “Formal/Informal” and “German/English” during the mailing process.
Create New receiver group
Before you can assign receivers to a group, it must first be created.
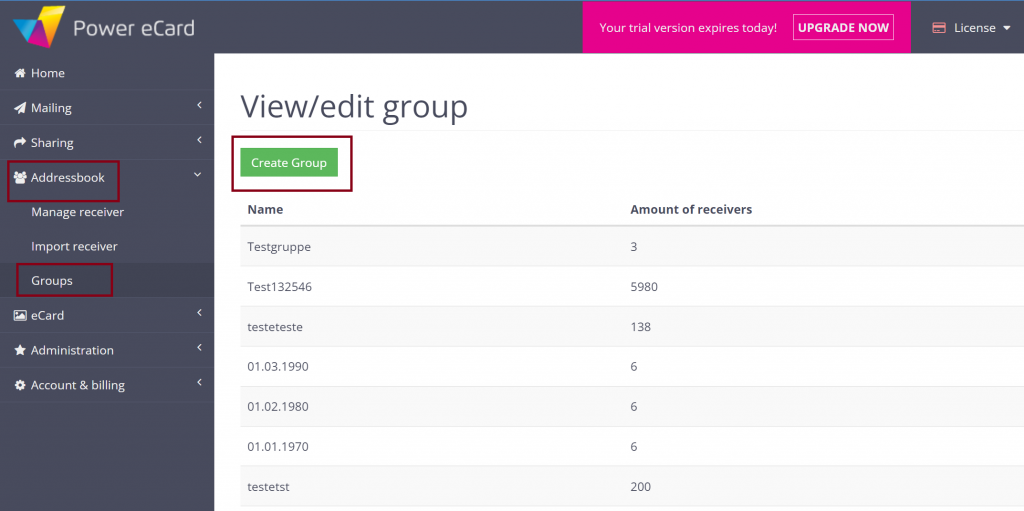
To do this, click in the menu on Address Book > Groups > Create Group.
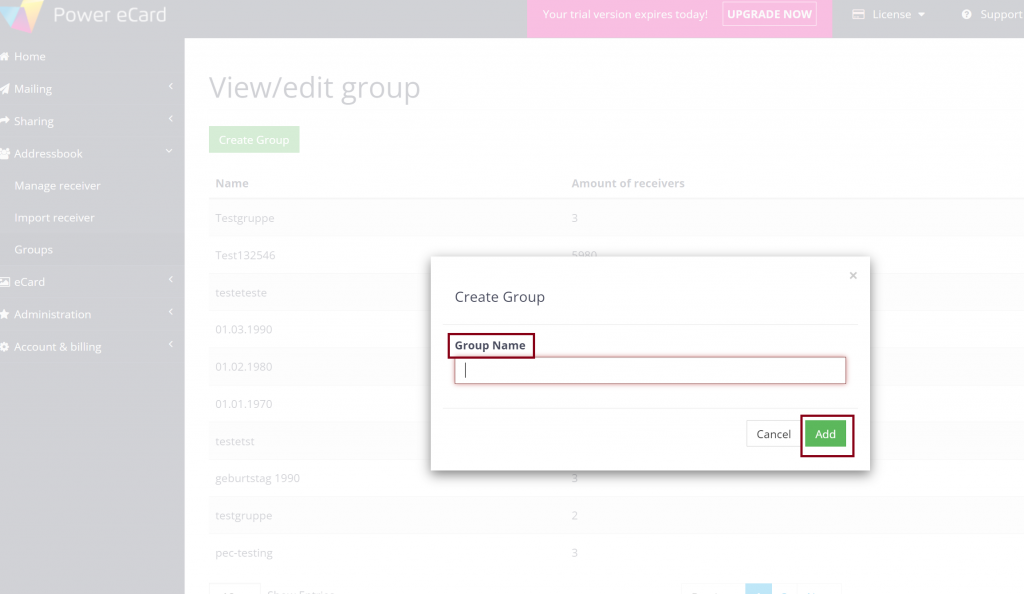
Now you have the option of defining the name of your new group and adding it. You are then automatically taken to the group management.
Manage receiver groups
In the group management you can see the various receiver groups and have the option of deleting entire groups, editing their names and removing specific receivers from a group.
To do this, select Address Book > Groups in the menu.
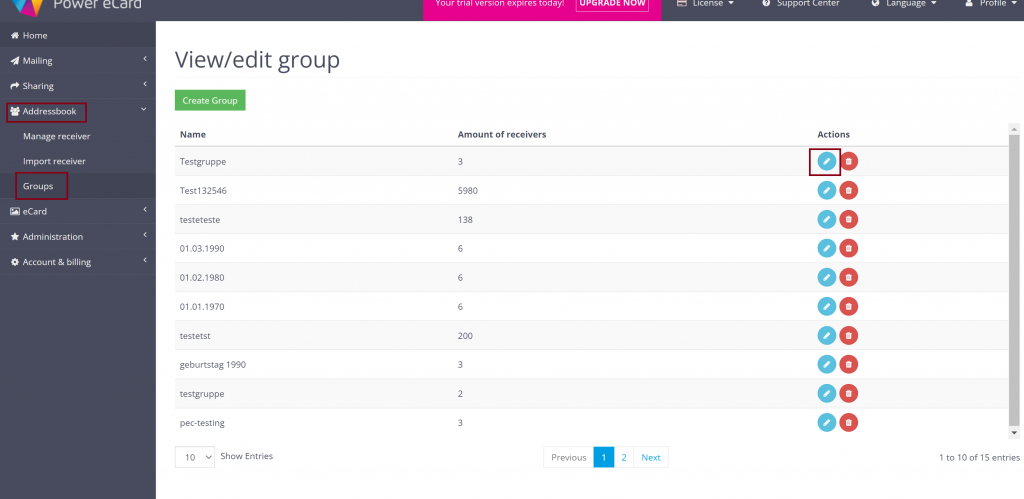
In the group administration you can see the various receiver groups with group names and the number of assigned receivers.
You can display more detailed information (salutation, name, e-mail, company, group) about the group members via the blue pencil icon on the right and completely remove groups via the red bin icon.
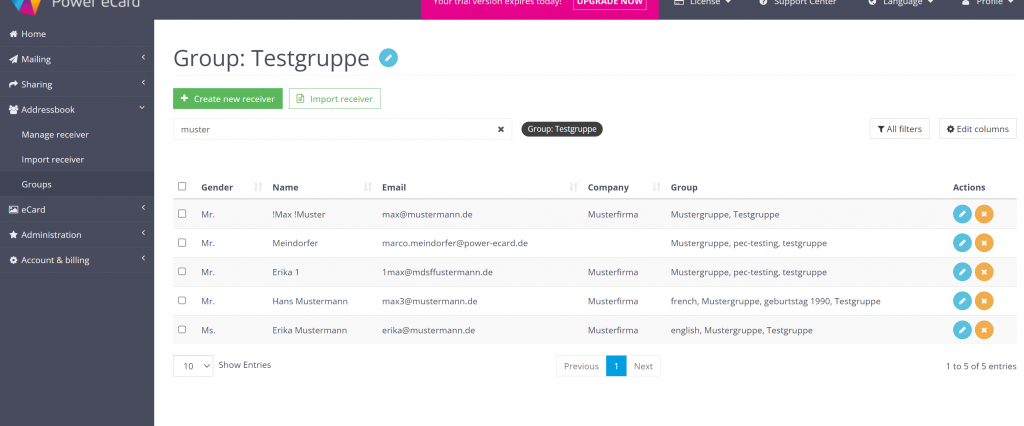
As described in the previous section, individual members can also be edited and deleted here using the pencil and bin icon. A detailed guide to managing individual receivers can be found here.
Assigning existing receivers to a group
Existing receivers can be assigned to new groups at any time. A single receiver or several receivers can be assigned at the same time.
Assigning individual receivers
To assign an individual receiver to a receiver group, select Address Book > Manage Receiver in the menu.
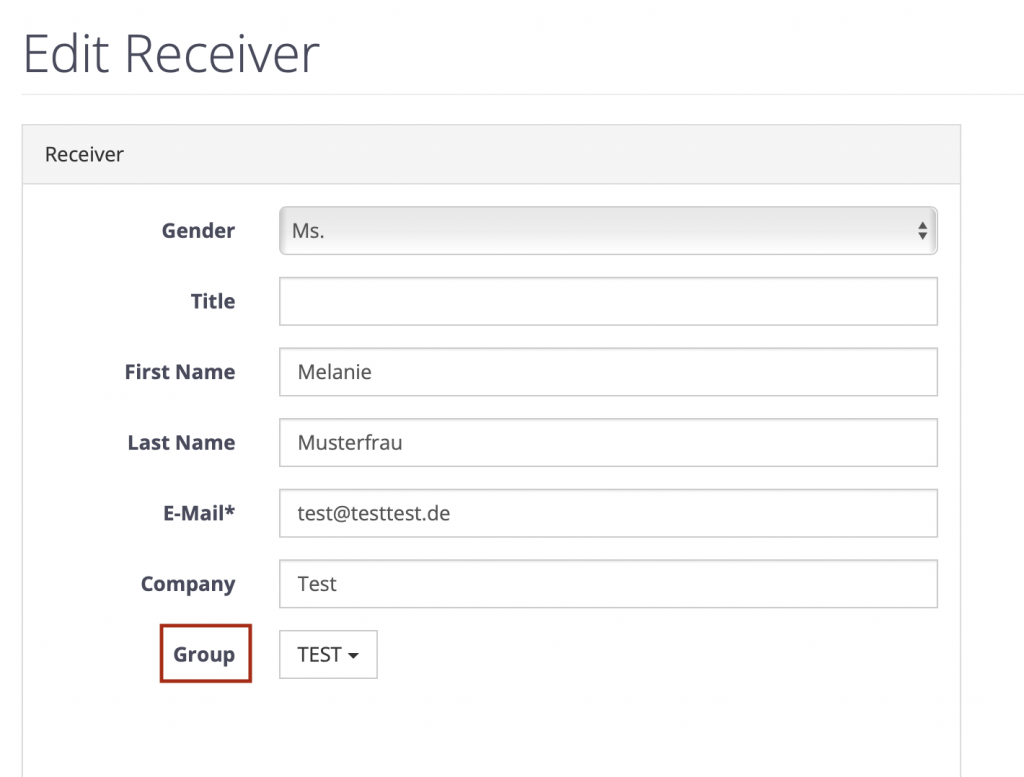
Click on the pencil symbol of the desired receiver to enter the editing mode of the contact.

Under Group you can select one or more groups in the drop-down menu and assign them to the receiver. Then save your changes.
Assigning several receivers at once
To assign several existing receivers to a group at once, select Address Book > Manage Receivers in the menu.
You now have the option of placing a check mark next to the receivers that are to be assigned to the same receiver groups. The fields for setting the check marks are located to the left of the gender of the recipients (see graphic).
Click on Edit below when all the desired ticks have been set.

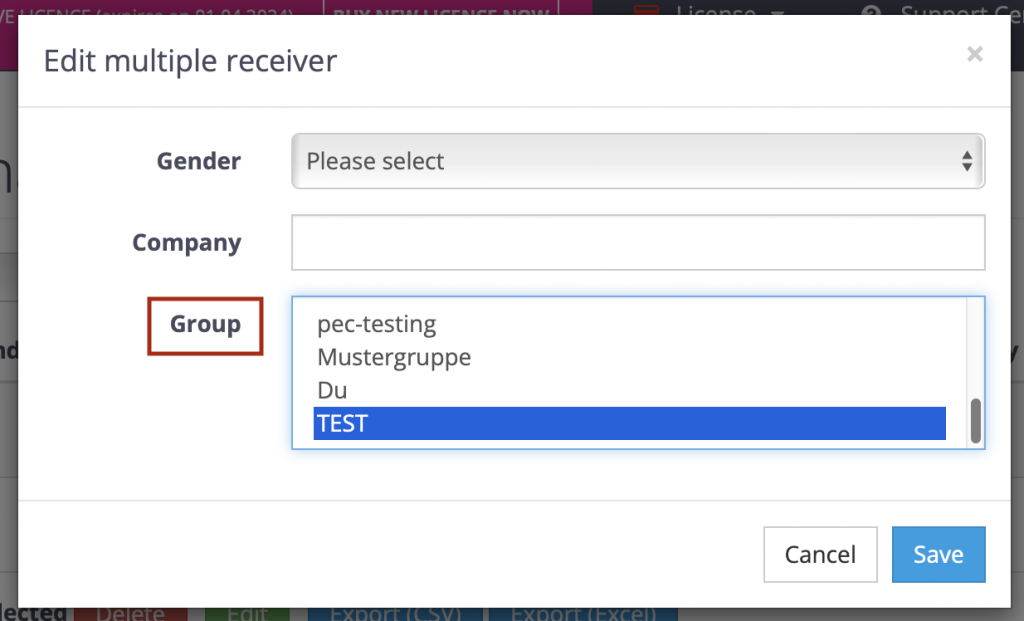
In the edit field that now appears, you have the option of adding the group to the contacts you have selected. To do this, click on the desired group names in the drop-down menu. Then save your changes.
Assign an entire import file to one group
When importing your receivers, you already have the option of assigning them to a group. If you want to assign all receivers within a list to the same group, you can do this within a few clicks.
To do this, go to Address Book > Import Receiver in the menu.
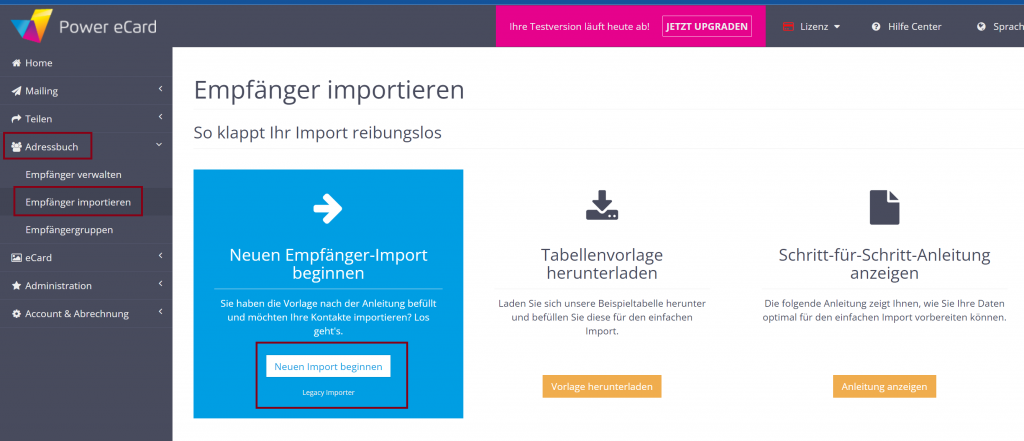
When you select a file for importing receivers, you can also select a receiver group from the drop-down menu under Import group.
When you click on Import Receivers, all the contacts in the file are automatically assigned to the selected group.

Assign import list to different groups
f you want to assign a number of new contacts to different groups, this can be done before the actual import.
To do this, go to Address Book > Import Receiver in the menu. Now the import template can be downloaded as a CSV in which the different receiver groups are specified.
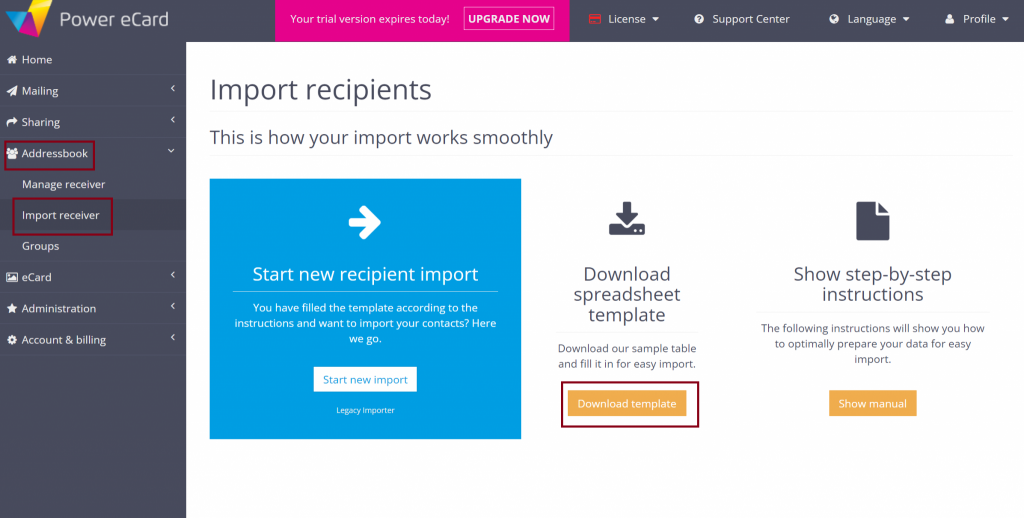
Open the downloaded file and fill in the fields with the data of your receivers. In the column group you can now enter the intended group name of the respective receiver.
If you have already filled a file with receiver data, you do not need to download it again. Simply add the respective group names to the file in the group field.

Once all group names have been entered, the file can be uploaded under Address Book > Import Receiver > Import File*. By clicking on Import Receiver, the new contacts, including the assigned group, are saved in your address book.

Practical example Formal/Informal and German/English
The most common use of receiver groups relates to the form of address and the language of the eCards. In the following we explain step by step how to divide your receivers into the groups Formal/Informal and German/English and how to select them for the corresponding mailing.
1. Determine Salutation / Language during import
To optimally divide your receivers into Formal/Informal, the correct form of address should already be defined in the form of a corresponding group when importing the contacts.
To do this, follow the steps listed in the section Assigning the import list to different groups.
For example, in the import list, enter formal as the group if a formal address is to be used for the contact and informal if the contact is to be addressed informally.

If it concerns the language of the eCard, DE can be entered as the group, for example, if the contact is German-speaking and ENG if the new recipient is English-speaking. The same principle applies to all other desired languages (e.g. fr, it, cz etc.).

The now edited list can be uploaded in the menu under Address Book > Import Receiver.
2. Create several card versions
If your receivers have been successfully divided into receiver groups, you can now create the corresponding cards.
For example, a group that is to be formally addressed needs a card with formal text. In this section we show you 2 possibilities for concrete implementation.
2.1 Multiple localizations of the same eCard
If you have already created an eCard and now want to add a new language version, you can do this by creating a new localization.
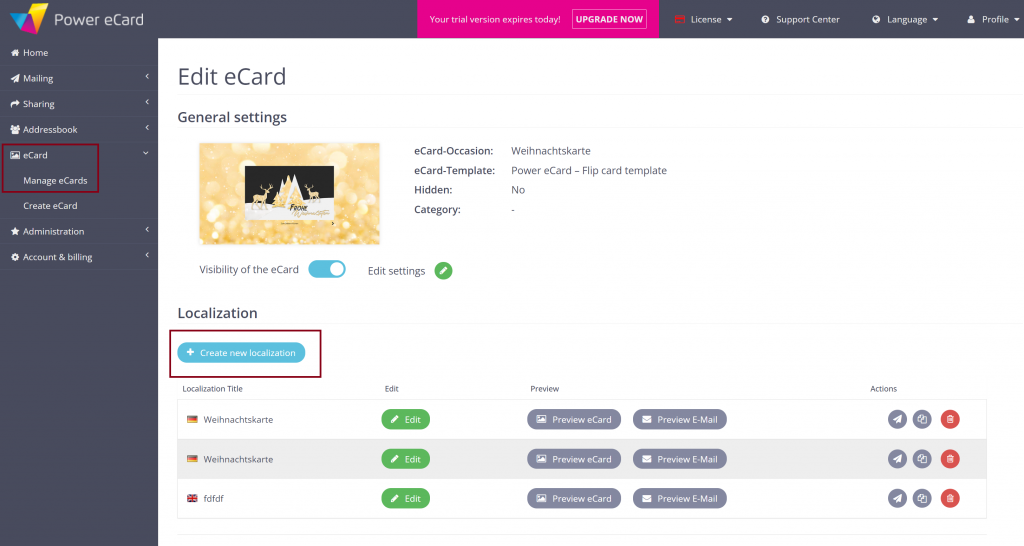
To do this, click on eCard> Manage eCards in the menu and select your desired eCard. Now click on Create New Localization.
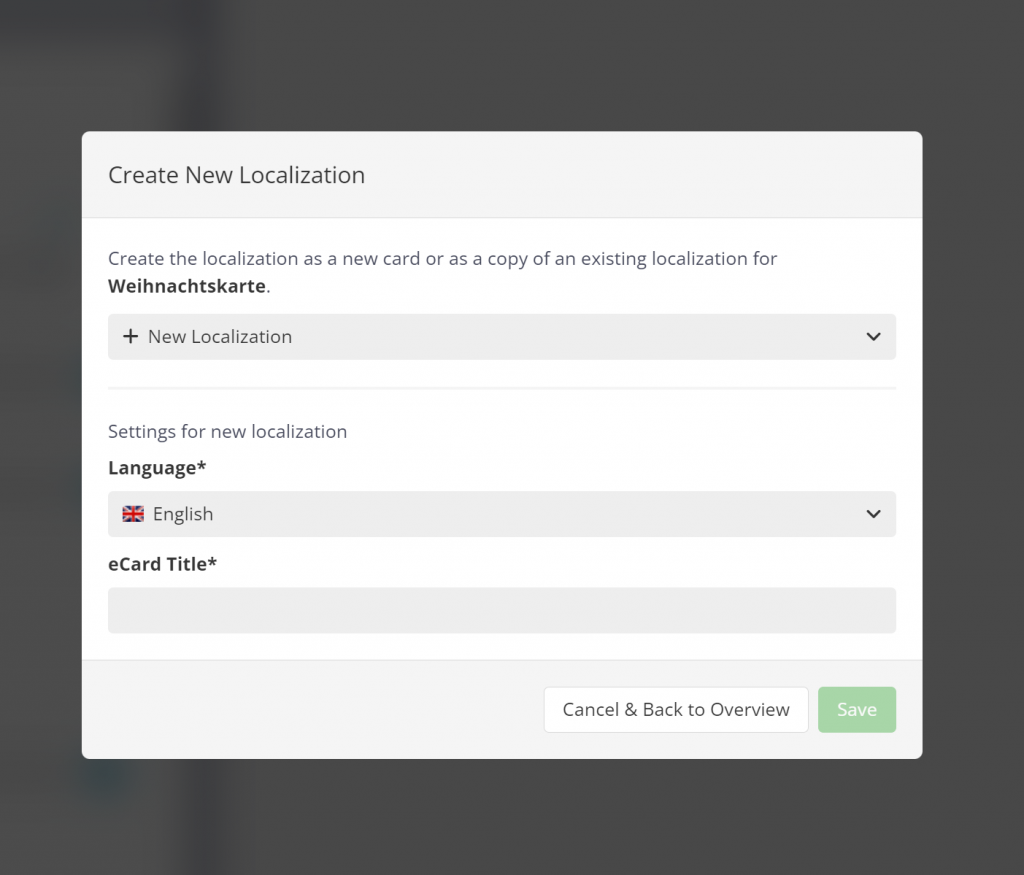
Now you can select a language from the drop-down menu and define an eCard title. If you have previously created a receiver group called Arabic, for example, you have now created an Arabic version of your eCard that you can fill with Arabic texts.
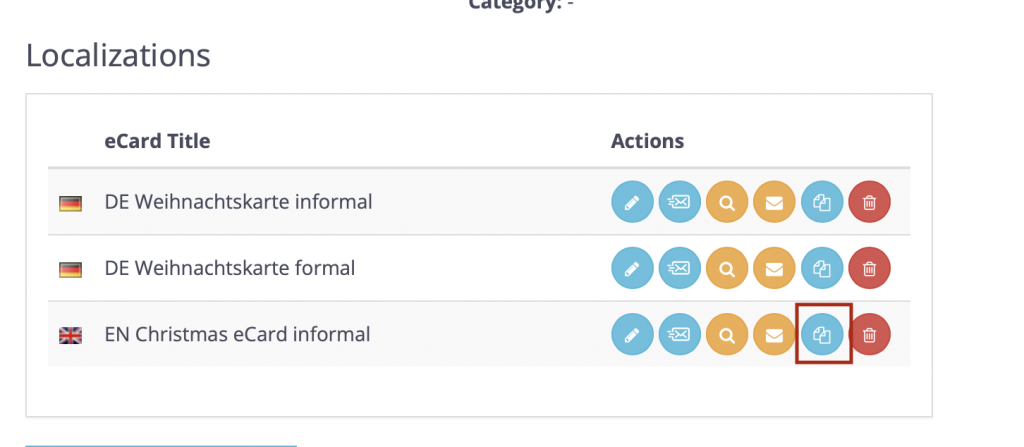
If you only want to create formal/informal versions, it is sufficient to duplicate the existing english localization and use one version for the formal address and the other for the informal address.
Informal texts are therefore used in the texts of the localization EN Christmas Card Informal, while formal formulations are always used in the localization EN Christmas Card Formal.
2.2 A new eCard version in each case
Alternatively, you could create completely new eCards, each intended for a different group of receivers. So instead of creating various versions of the same eCard, several eCards with completely new content are created here.
To do this, click on eCard> Create eCard in the menu and select a design or template of your choice.
When it comes to dividing your receivers into formal/informal, the first card could be named Christmas Card Formal. Repeat the process and name the next card Christmas Card Informal. Save each of the eCards and fill them with appropriate content. Now you have two suitable cards for the groups you have already created (formal/informal).
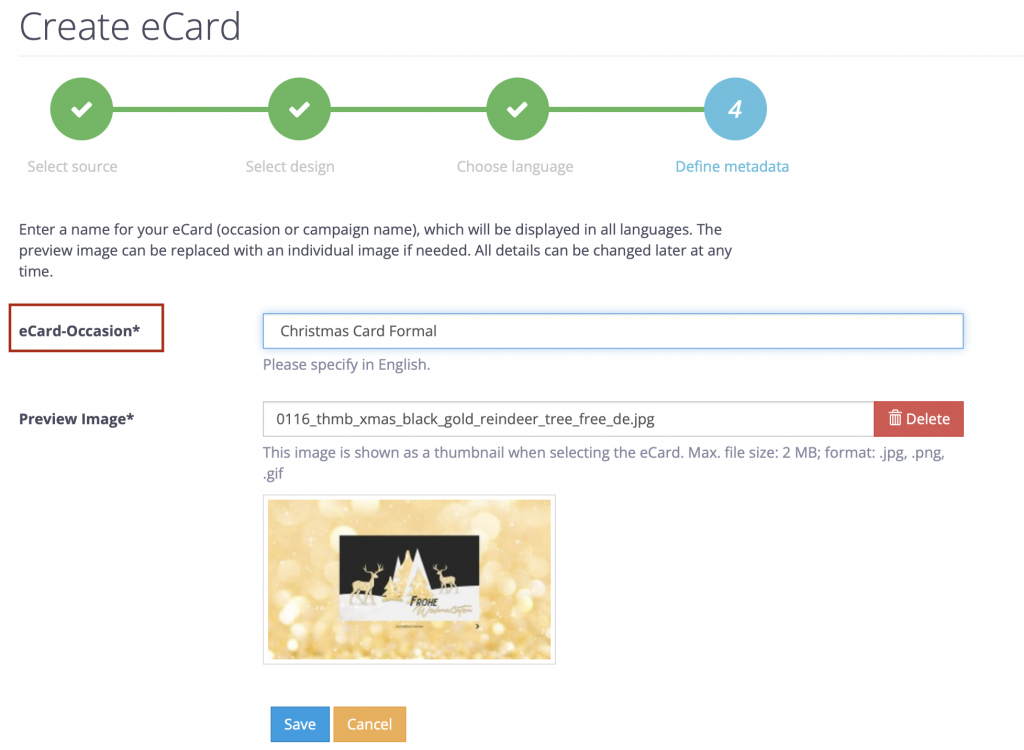
The same basic principle applies to the various language versions. Here, too, create a new eCard and select e.g. German as the language and Christmas Card DE as the eCard occasion.
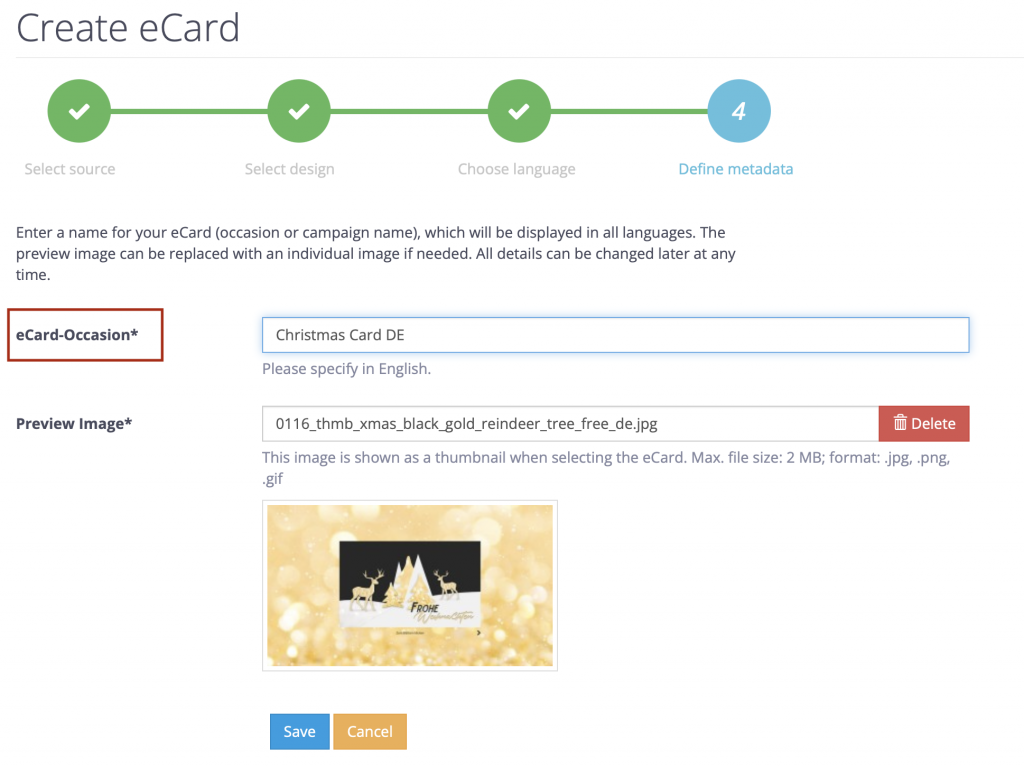
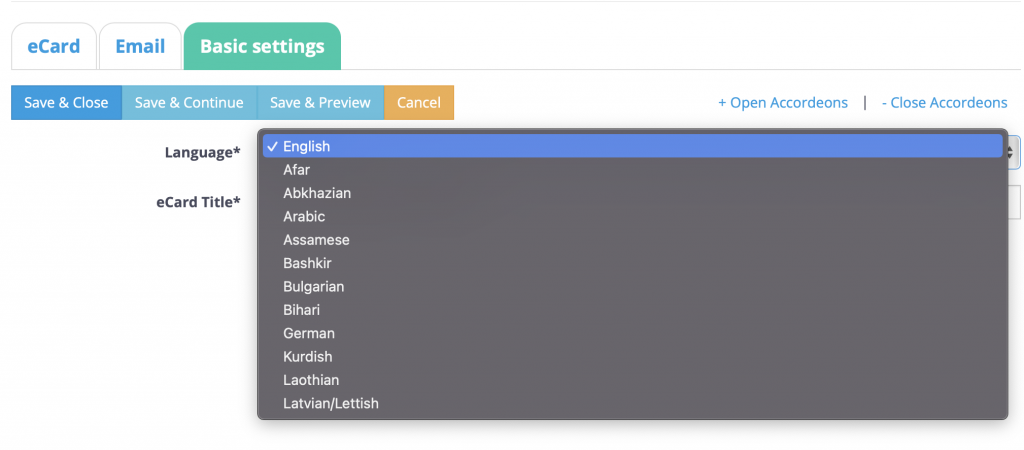
To create a new language version other than German or English, an English version must first be created. The language can then be changed later in the editing mode of the eCard.
To do this, go to the basic settings of the desired eCard. The language and the eCard title can now be redefined and saved.
3. Sending the various versions
Now that you have created various versions of the eCard (point 2), you can finally send them to the corresponding groups (point 1).
To create a mailing, go to Mailing > Create new mailing in the menu.
Now you can select the eCard or the localization of the eCard that was created for the group intended here. For example, if you want to send an informal Christmas card, the localization English – EN Christmas Card informal is selected for the mailing.

By clicking on next, you can now select the informal receiver group, which you have already filled with the matching receivers as explained in (point 1).
An explanation of how to create new groups can be found in the section Create new receiver group.
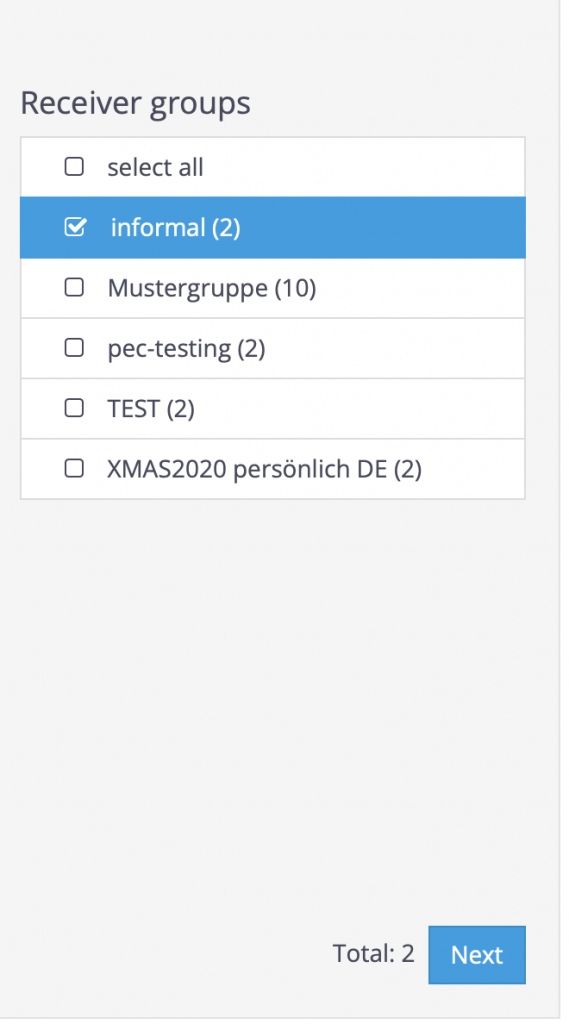
Once you have selected the right card and the matching receiver group, you can click Next to follow the regular Mailing process and send the eCard. A detailed description of the Mailang process can be found here.
The same principle applies to all other examples of receiver groups. For example, if you want to send an eCard to your German-speaking receivers, the previously created DE localization of the eCard will be sent to the matching DE receiver group.


