After the completion of your eCard design by your admin, you now have the possibility to start the mailing of this card to your receivers. In this guide, you will learn step by step how to send your previously designed eCard.
Complete Video Tutorial
Step 1: Create a receiver list
In the first step you define the receivers of your Power eCard mailing.
Every Power eCard User has an individual address book in which their own contacts can be maintained and managed.
To prepare your first mailng, you need to maintain the addresses of your receivers. These can be entered individually or imported into the system via lists.
Option 1: Create new receivers individually
This option is suitable if you only have a few receivers. To do this select Address Book> Manage receivers >Create New Receiver in the menu.
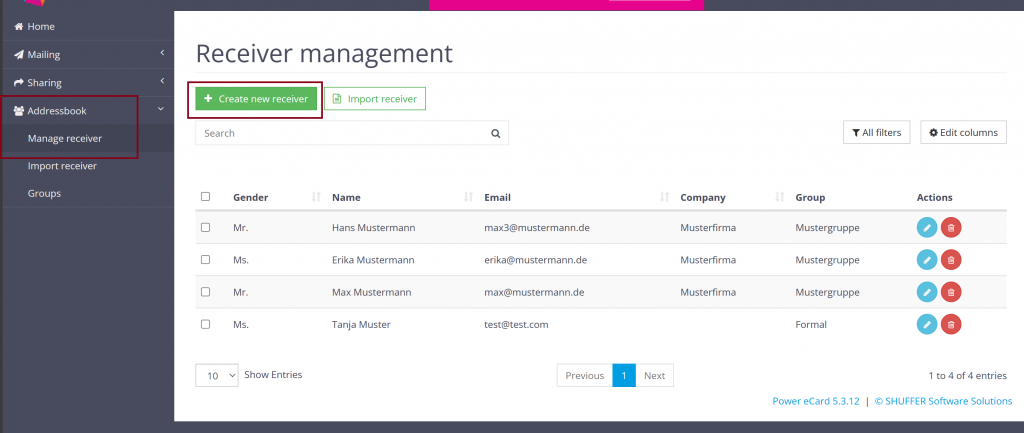
The following screen opens in the next step:
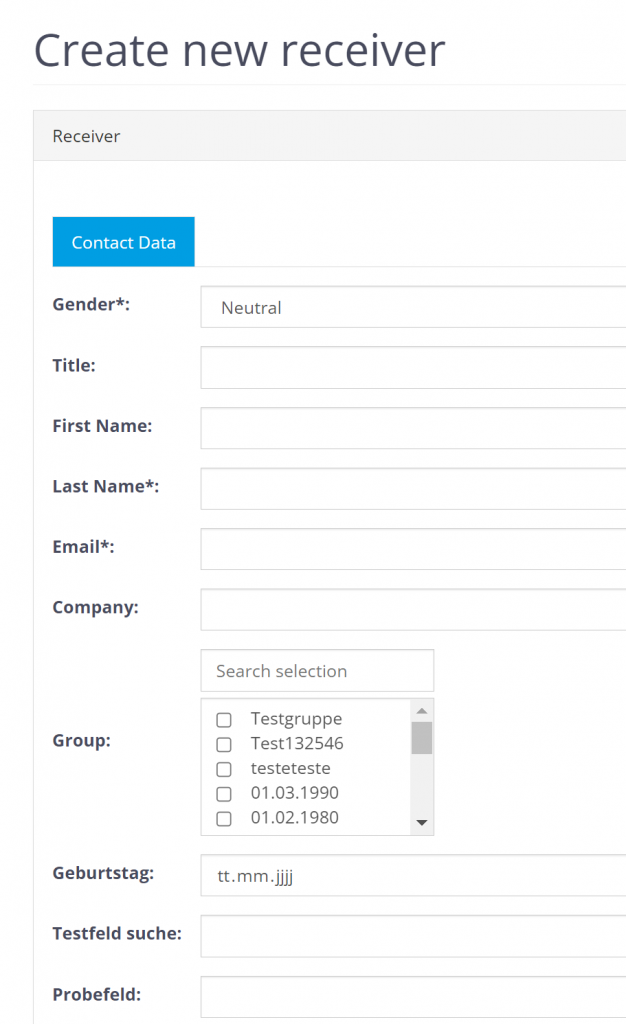
- Fill out all relevant information. Pay special attention to the relevant fields for personalization (gender, title and name).
- Assign the new contact to a receiver group (optionally). You can find a detailed guide on the subject of receiver group for your admin here.
Option 2: Import entire receiver lists (Excel, CSV)
If you have a larger number of receivers, this option is suitable. We recommend that you watch the step-by-step instructions (with video) on this page beforehand.
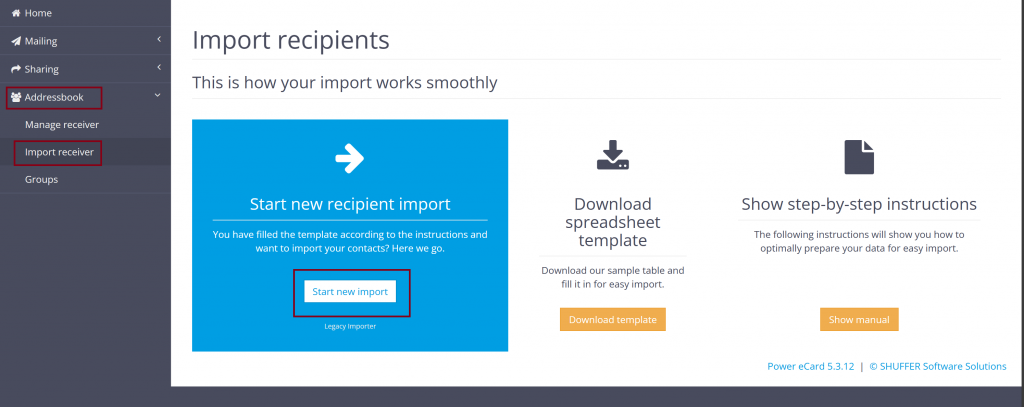
To access the import area, select Address book > Import receivers in the menu. Our download spreadsheet template is available there, which you can simply download. Alternatively, you can also use your own list for the import.
Once you have filled your receiver list accordingly, select Start new import.
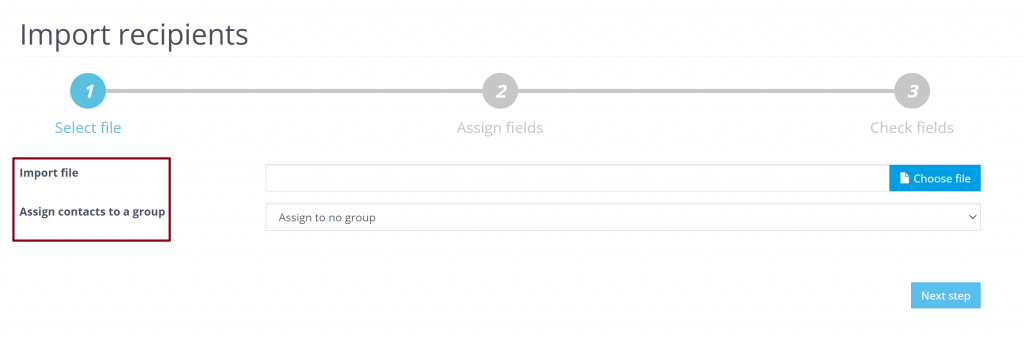
- Select the desired receiver list from your local directory on your PC and upload it under Import file*.
- Optionally assign the receiver list to a specific recipient group under Assign contacts to a group.You can find a detailed guide on the subject of receiver group for your admin here.
- Click on next step to check the assigned fields and start the import.
Step 2: Choose an eCard Template
Video Tutorial
In the second step, the mailing gets started. Via the menu item Mailing > Create new mailing you will be guided through the mailing process step by step.
Here you must first select the eCard template that has already been adapted to your needs by the admin.
Choose eCard template
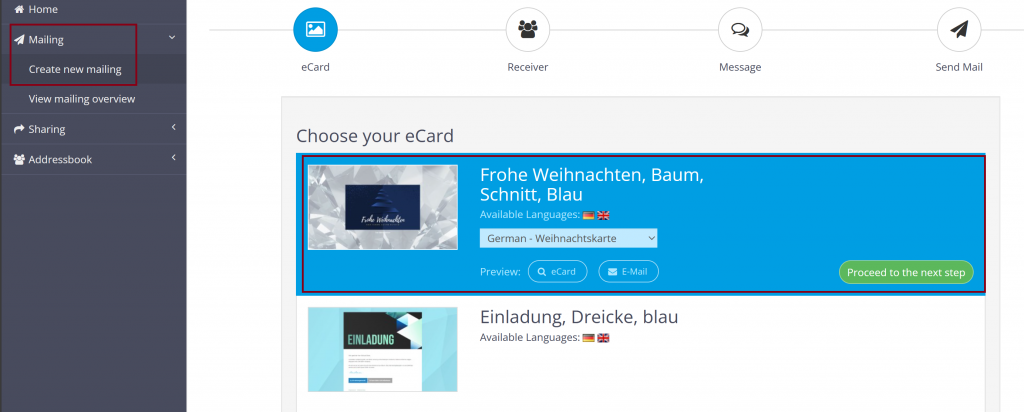
- From the menu, choose Mailing > Create New Mailing.
- Click on the desired eCard design.
- Select a language (if available).
- Confirm your selection by clicking Next.
Step 3: Select your receivers
In the third step, you can now use the previously created receivers and receiver lists from your personal address book.
Simply select the desired receivers of your mailing by clicking on the respective entry. You can select individual contacts or previously defined receiver groups.
Select receievers
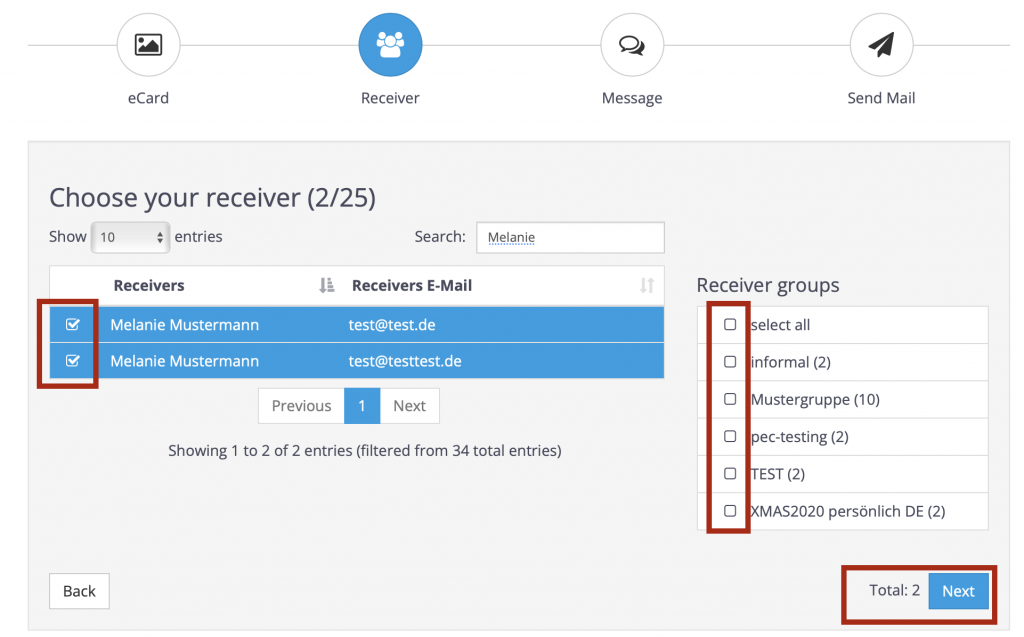
- Select individual contacts from your address book.
- With receiever groups you can select all contacts belonging to this group at once.
- The search function allows you to search your address book for individual contacts.
- Confirm your selection by clicking Next.
Step 4: Write your greeting text
In the fourth step, you can now add a greeting text to your eCard. By default, a template text is displayed here that you or your colleagues have entered in the template. You can add to or change this if the customisation of the greeting text has been approved by the person responsible.
In addition to various formatting options, personalization options are also available.
Write a greeting text
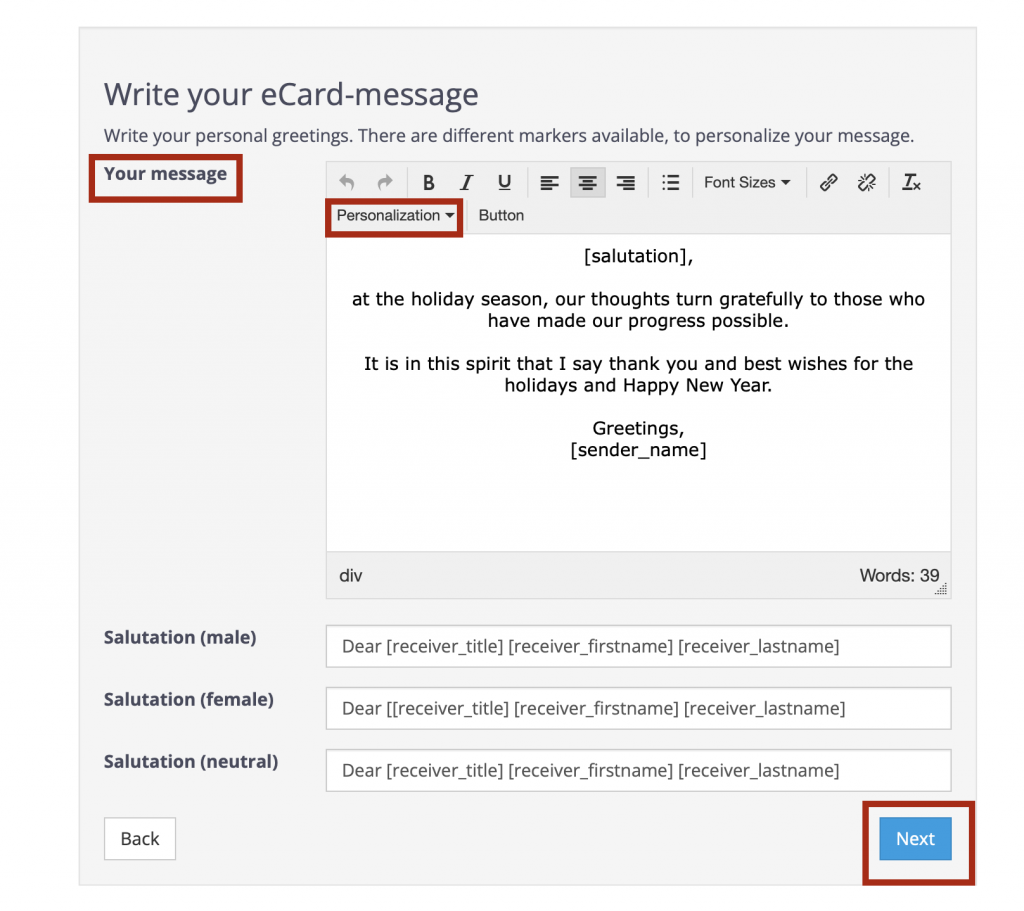
- Write a personal greeting text in the field Your message.
- There are various markers available for personalizing the eCard.
- Under Personalization in the text editor you can specify general information about the salutation and greeting of your message.
Step 5: Start the mailing
In the fifth and final step you start your Power eCard mailing.
Before you send the eCards, you can check all the previous settings in a mailing overview.
Mailing overview & starting the mailing
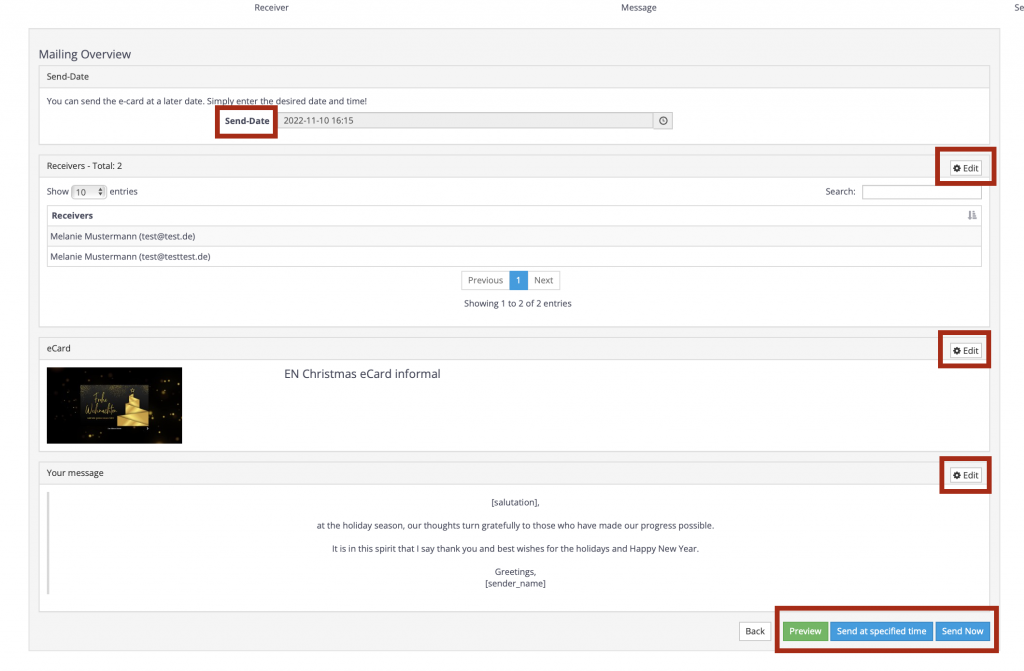
- Set a date for your mailing. If you do not specify a special date, you can also send the mailing immediately.
- Check your receiver list. If necessary, you can adjust it via the Edit button.
- Check the selected eCard design You can change it via the Edit button.
- Check your greeting text and adjust it if necessary using the Edit button.
- You can now generate a preview of your eCard by clicking Preview. The eCard opens in a new window in your browser.
- Now send the mailing by sending it on a specified date or send it now.