Video Tutorial
Step-by-Step Text Guide
With the launch of our new address book, uploading and importing receivers has become much easier. Below you will find step-by-step instructions for the new import of a recipient list.
1) Use our ready-to-use import template to upload contacts.
2) Make sure that email addresses are not repeated in order to avoid duplicates.
3) If you add more columns to our import template, please avoid giving the new columns an existing name.
4) As an admin, you can define the fields Gender and Last Name as non-required fields.
To do this, click on Administration > Settings > Extended in the menu and remove the ticks from the corresponding required fields.
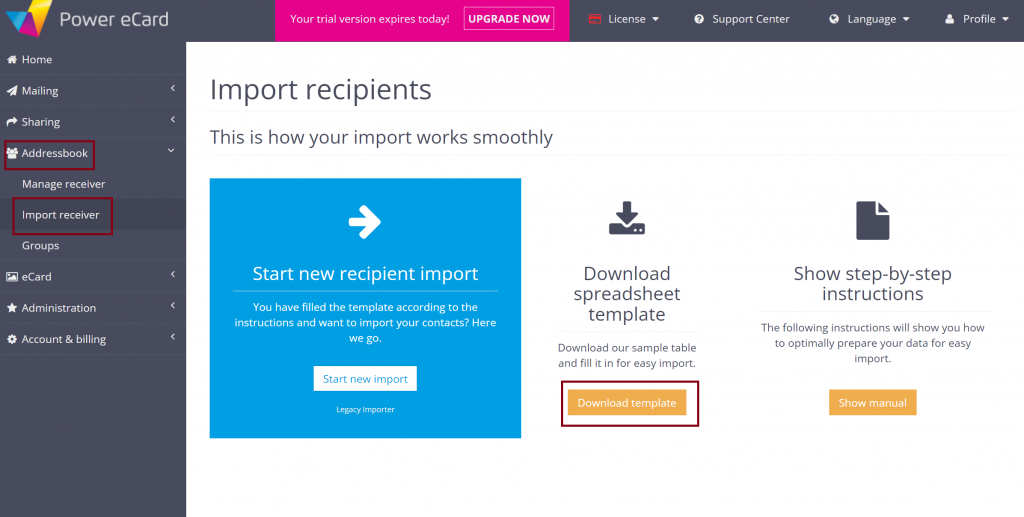
Import receivers
Click on Address Book > Import Receiver in the menu bar on the left.
By clicking on the yellow button Download template, which can be found under the item Download spreadsheet template, you download a sample table in CSV format that contains the following structure:
firstname;lastname;email;gender;title;company;group;
Max;Mustermann;[email protected];Herr;;Musterfirma;Mustergruppe;
Erika;Mustermann;[email protected];Frau;Dr;Musterfirma;Mustergruppe;
Hans;Mustermann;[email protected];Herr;Prof.Dr.;Musterfirma;Mustergruppe;
You can use the sample names or data as a guide and fill the table with your own contacts accordingly.
The following values can be entered for the gender: Male: ‘hr’,’m’,’herr’,’mr’,’herrn’,’hrn’,’mister” Female: “fr”, “f”, “frau”, “ms”, “mrs”, “miss
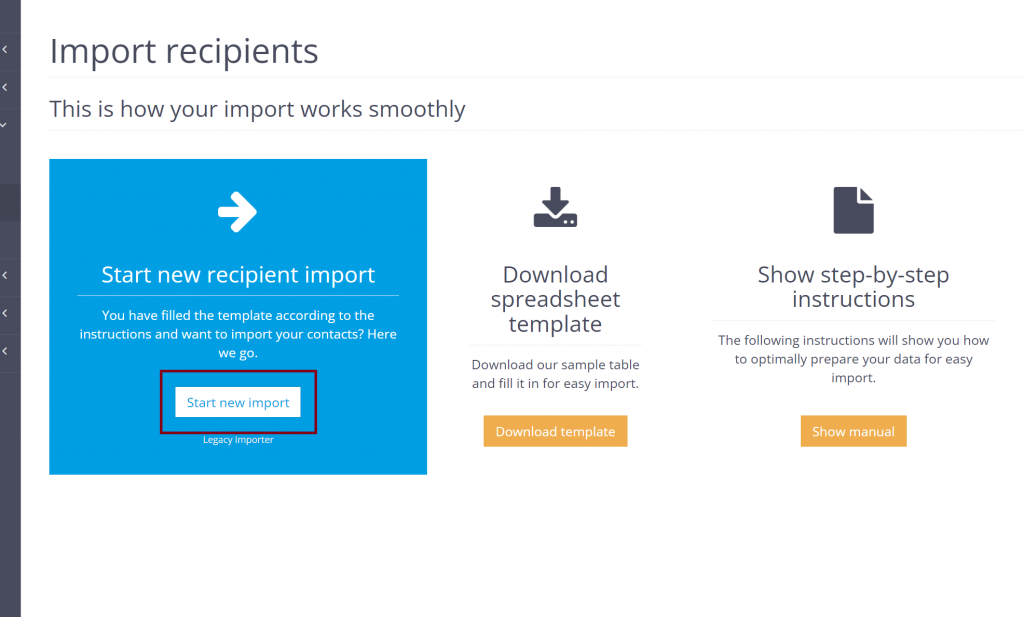
Once you have entered your receivers in the sample file, the import can be started. To do this, click on the white Start new import button in the Start new receiver import column.
On the page that now opens, you can select the desired address list from your local directory on your PC in the Import file field.
If desired, the receivers in the list can also be assigned to a group before the import. All receivers are assigned to the selected group. To do this, create the receiver group in the system prior to importing the receivers.
Then click on the Next Step button at the bottom right.

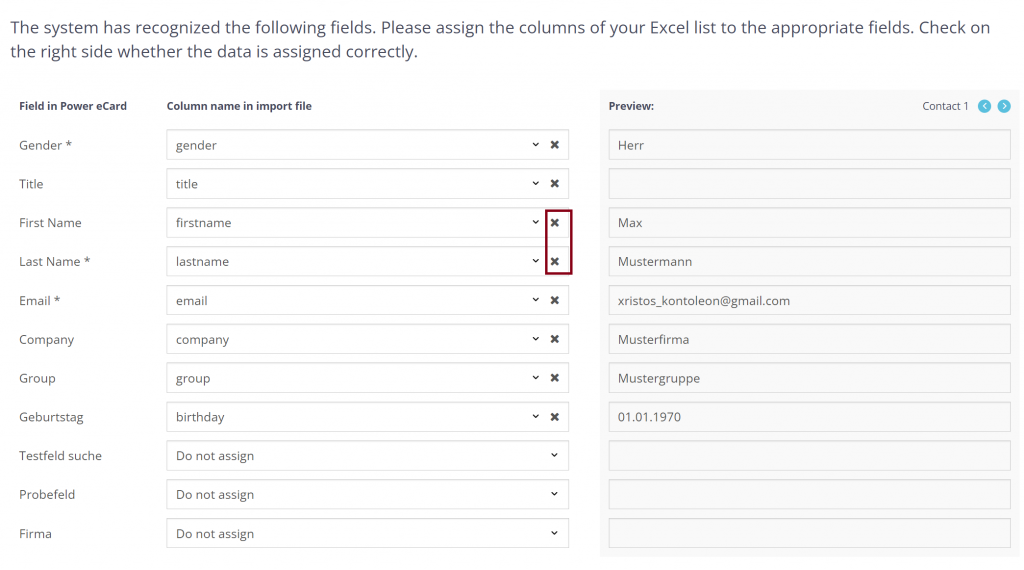
In the next step you will see which fields our system has automatically recognised and assigned. Please check on the right side if the assignment of the data is correct. The columns of your Excel list should correspond to the column names given. The first contact of your uploaded list serves as an example. If this is the case, you can click on Import now at the bottom right and start the upload.
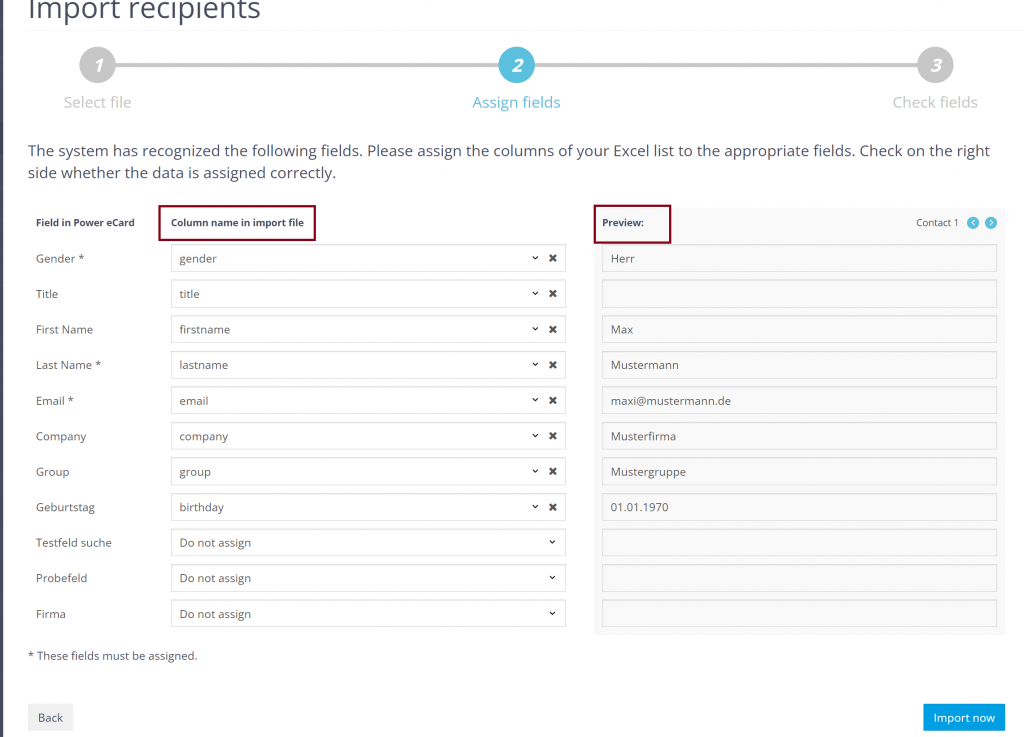
If a field has been assigned incorrectly, you have the option of swapping the column labels. In the dropdown of a column you can see the available fields and select one if necessary.
If, for example, you want to swap first name and surname, you can click on the X to remove the respective assigned column designation and define new, available ones.
Once the column labels have been correctly assigned, you can click Import Now at the bottom right and start the upload.
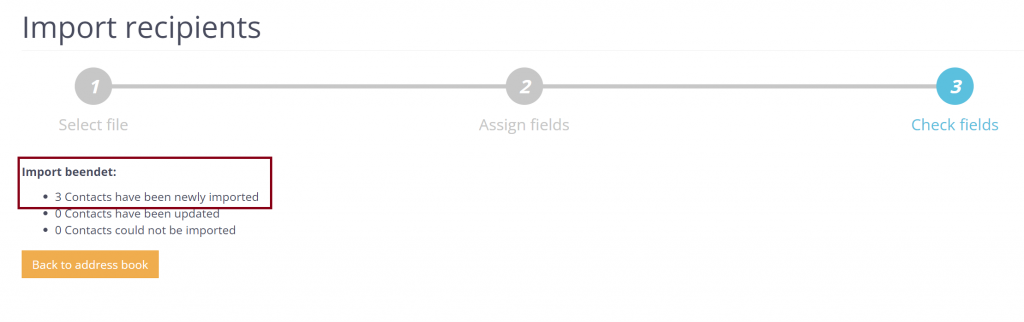
After the process, a short report about the import process is displayed.
The e-mail addresses are checked for plausibility during import; incorrect e-mail addresses are not taken into account during import. Duplicate e-mail addresses result in the respective contact being updated.
Possible error messages
If an error message is displayed before or during the import, the source of the error must be corrected before the import can be completed successfully. Below you will find a list and explanations of all error messages.
Before import:
- The size of the uploaded file exceeds the maximum allowed
- A file may be a maximum of 20MB in size or such large files are not recommended.
After import:
- Incorrect e-mail address for the receiver
- The receivers could not be imported because the field “E-Mail” was empty or an incorrect e-mail address was entered. The e-mail may be incorrect or invalid if, for example, the @ character is missing or the address contains an invalid special character (comma, etc.).
- Missing data for the receiver
- The receivers could not be imported because the “Last name” field was empty. To import the contacts, the “Last name” field must be filled in correctly.
- Incorrect data set of the receiver
- The receivers could not be created, the cause is unknown. Please check the entries manually for plausibility and syntax.
- Blocked receivers
- The receivers could not be imported because they are on the global blocked list. Blocked contacts (unsubscribes, undeliverable addresses, etc.) cannot be re-imported. To access the blacklist, please contact your administrator.
- Reasons for blocked receivers are as follows:
- Receiver globally marked as undeliverable
- Receiver globally unsubscribed from all mailings (opt-out)
When creating / editing a receiver:
- The Email field is a required field.
- The Last Name field is a required field.
- The Gender field is a required field.
Verwandte Guides, die Sie interessieren könnten: