Creating a serial mailing allows you to send eCards annually at a previously defined time. Automated mailings are sent to employees, customers or partners on recurring occasions such as birthdays or anniversaries.
Activate Serial Mailings
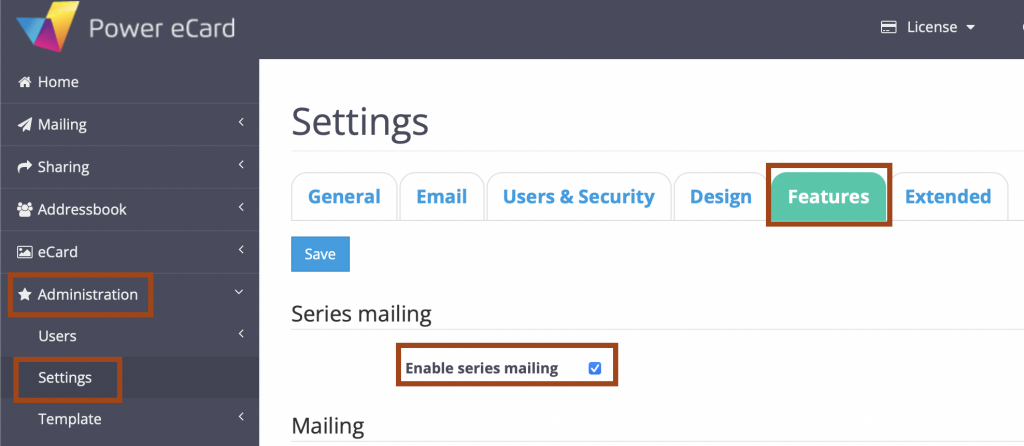
IMPORTANT: The serial mailing features has to be activated under Administration -> Settings -> Features.
Now tick the box Enable serial mailing.
Create Serial Mailing
To create a serial mailing, select Mailing > Create Serial Mailing on the left side of the menu.
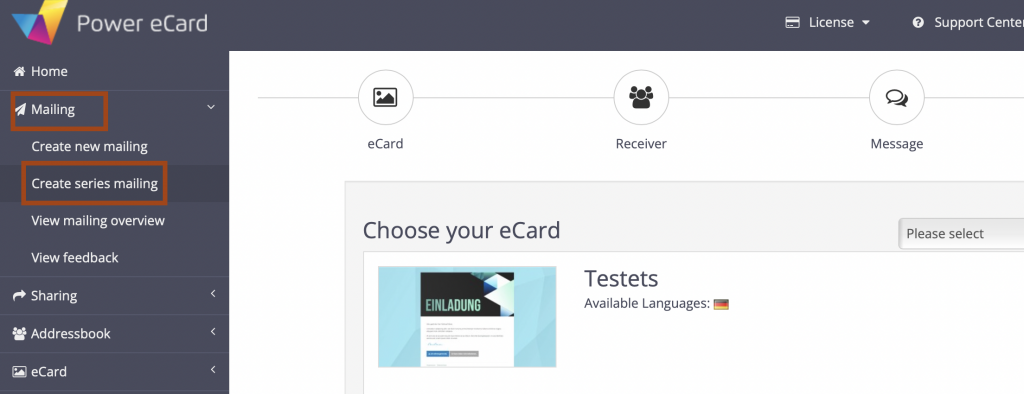
The procedure is similar to the steps of creating a normal mailing.
- Select an eCard template from the given list
- Select receivers (groups) from your adress book
- Write a personalized greeting text
- View and check the mailing overview
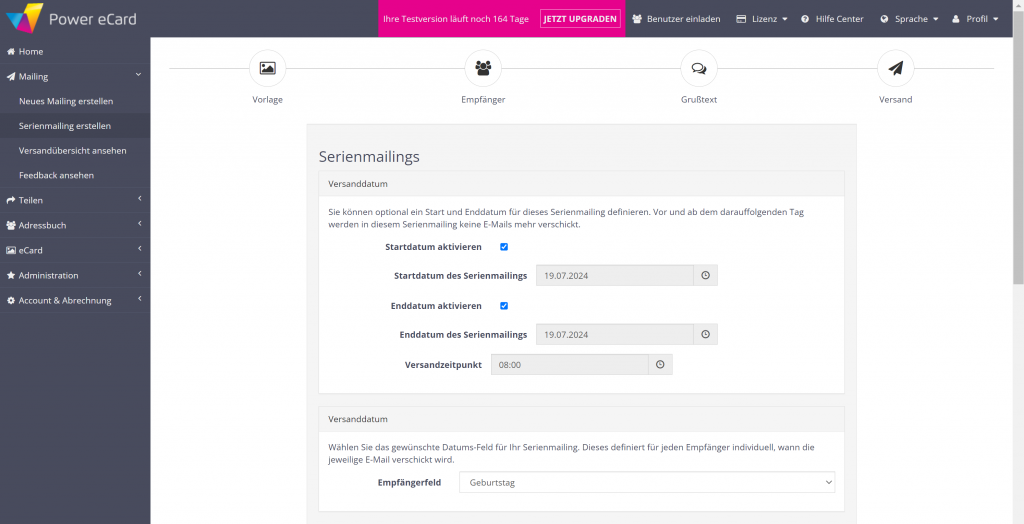
The only differences arises in the last step:
Here you have the option of setting a start date and end date for your serial mailing. If this is desired, check the box next to Enable start date and/or Enable end date. The field in which you can set the end date will then appear.
You can also specify the time at which the individual mails in the series should be sent automatically in the Sending time field. The sending time can be changed at any time.
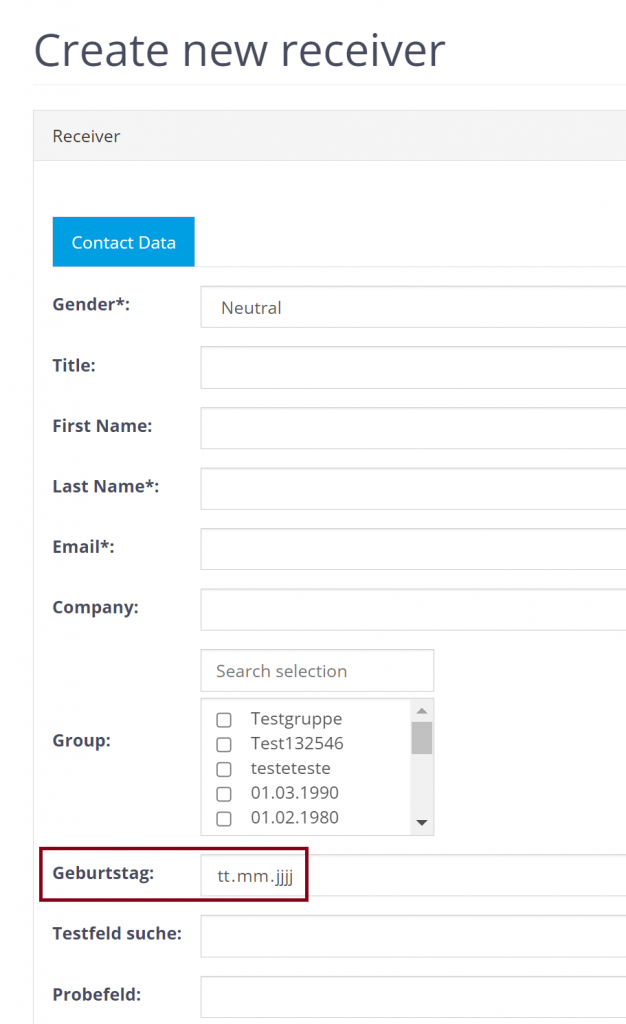
Finally you define a fixed mailing date based on a date field which refers to the receiver data.
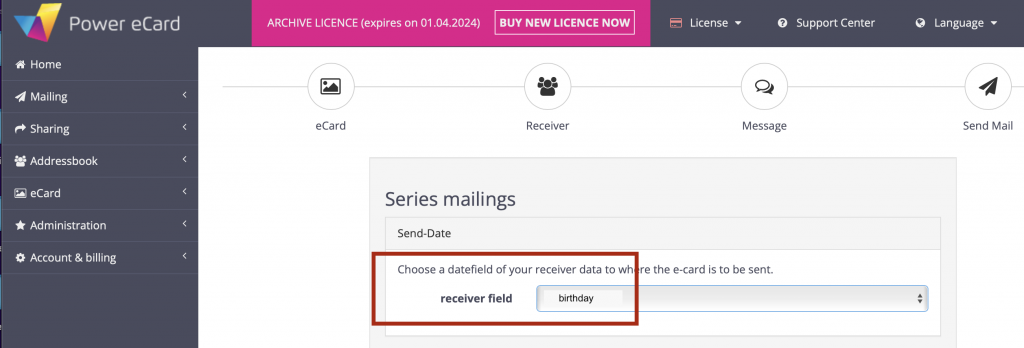
These receiver data are defined by creating a new contact or by editing an existing contact.
For example, a field for the date of birth can be filled in so that the serial mailing automatically sends a congratulation eCard every year.
Add additional receiver fields for a Serial Mailing.
If data other than the birthdays of your contacts is to be used for sending serial mailings, an additional receiver field must be added to the address book in each case.
Example 1:
If you want to send eCards for the annual company anniversary, you would add a new field called “Company anniversary” in the menu under Settings > Extended> Additional fields.
Example 2:
If you want to send an eCard as a reminder every three months, create four serial mailings, each of which goes out once a year. Each of these mailings needs its own new receiver field with a fixed send date. Under Settings > Extended > Additional fields, these can be named “Dispatch Q1“, “Dispatch Q2” and so on.
The new receiver fields are then displayed in the address book when contacts are added in the future and can be given an appropriate date, just like birthdays during the import of receiver data.
A detailed guide for adding new receiver fields can be found here.
Manage Serial Mailings
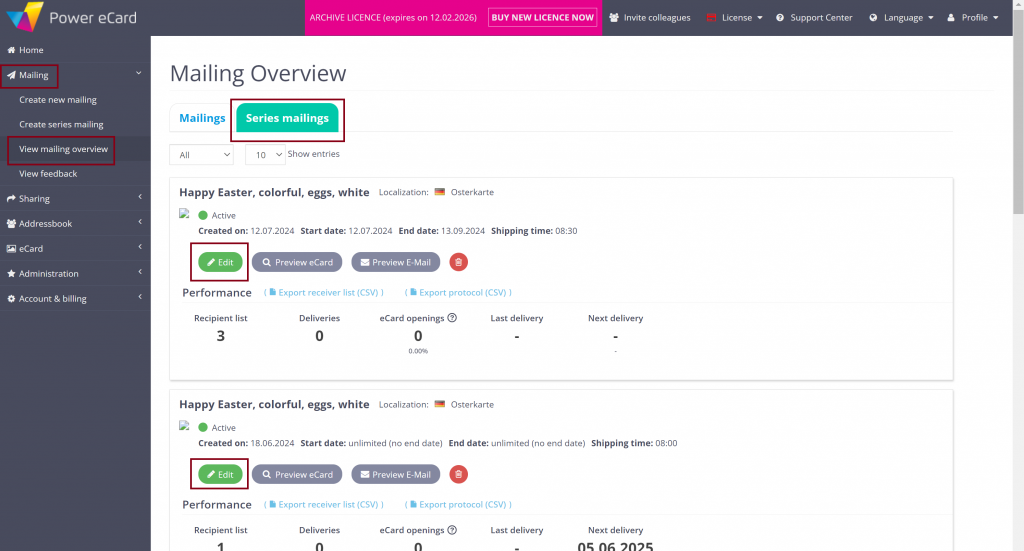
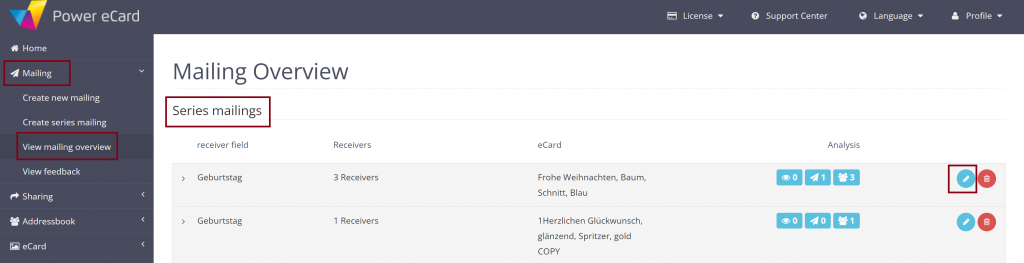
In the mailing overview, information about all serial mailings are listed seperately from the standard mailings, so you can always keep track of the upcoming serial mailings. To see the overview click on Mailing>View Mailing overview.
If you select the Serias mailing tab at the top, you will receive – as in the Mailing tab – a complete overview of all serias mailings created.
Both the creation date and the end date of each serial mailing are listed in this overview. If no specific end date has been set, the end date is displayed as unlimited. You can also see the name of the localzsation including the language of the relevant serial mailing in the overview.

The analysis provides insights into the respective number of deliveries, eCard openings, undeliverable mailings and unsubscriptions.
Edit Serial Mailing
To edit a serial mailing that has already been created, click on the green pencil icon for the respective serial mailing in the menu under Mailing>View mailing overview.
Clicking on the pencil icon takes you seamlessly back to the creation process for serial mailings. Here you have the flexibility to change the chosen eCard, the receiver list and the greeting text. You also have the option of setting an end date and defining the receiver field, which contains the respective dispatch dates.
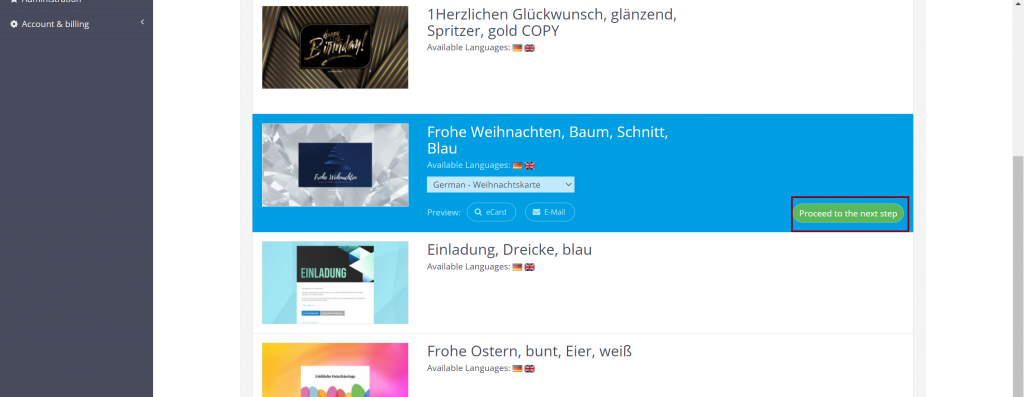
The original selection for the serial mailing is highlighted in blue and can now be changed by you. For the individual steps in the creation process, see Create serial mailing.
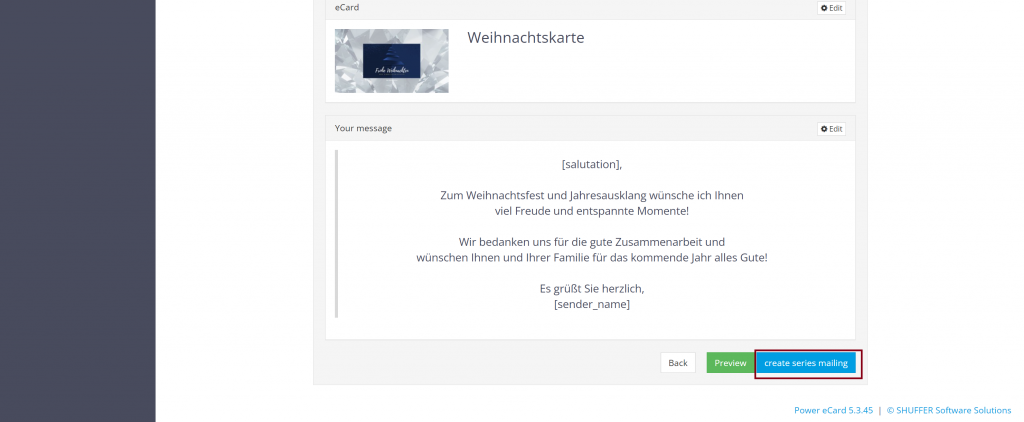
Once all changes have been made, click on Create serial mailing. All changes made to your existing serial mailing will now be saved.

Practical example 1: Current employees leave the company
Remove receivers from the mailing
If employees leave your company or are no longer intended for serial mailings for other reasons, you can easily remove them from the mailing list. To do this, click on the blue pencil icon to the right of the intended serial mailing in the menu under Mailing>View mailing overview.

You will now be automatically taken back to the serial mailing creation process.
If you want to keep the same eCard design, simply click on Continue to the next step.

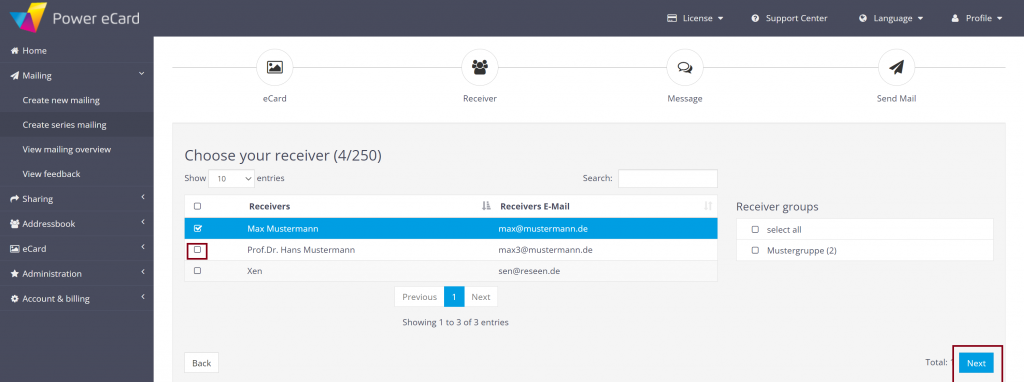
In this section, the original selection of receivers is already marked in blue. By simply clicking on the white tick next to the name of a receiver, you can now remove individual receivers from the selection.
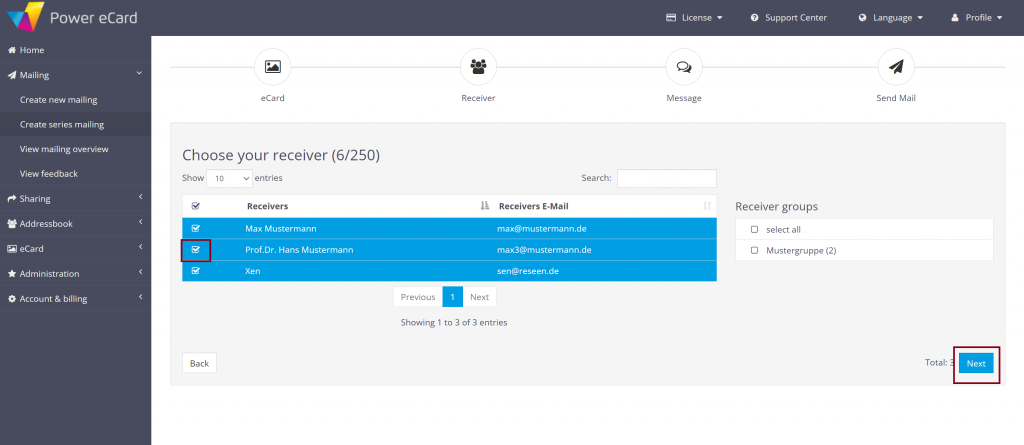
After you have removed the relevant receivers from the selection, continue the process by clicking Next. Then follow the steps in the mailing process as already explained in the second step Create serial mailing. As only the receivers are being changed in this example, click Next until you reach the overview page for serial mailings. Finally, confirm all the changes you have made by clicking on Create serial mailing.

Practical example 2: New employees join the company
Step 1: Create employees as receivers
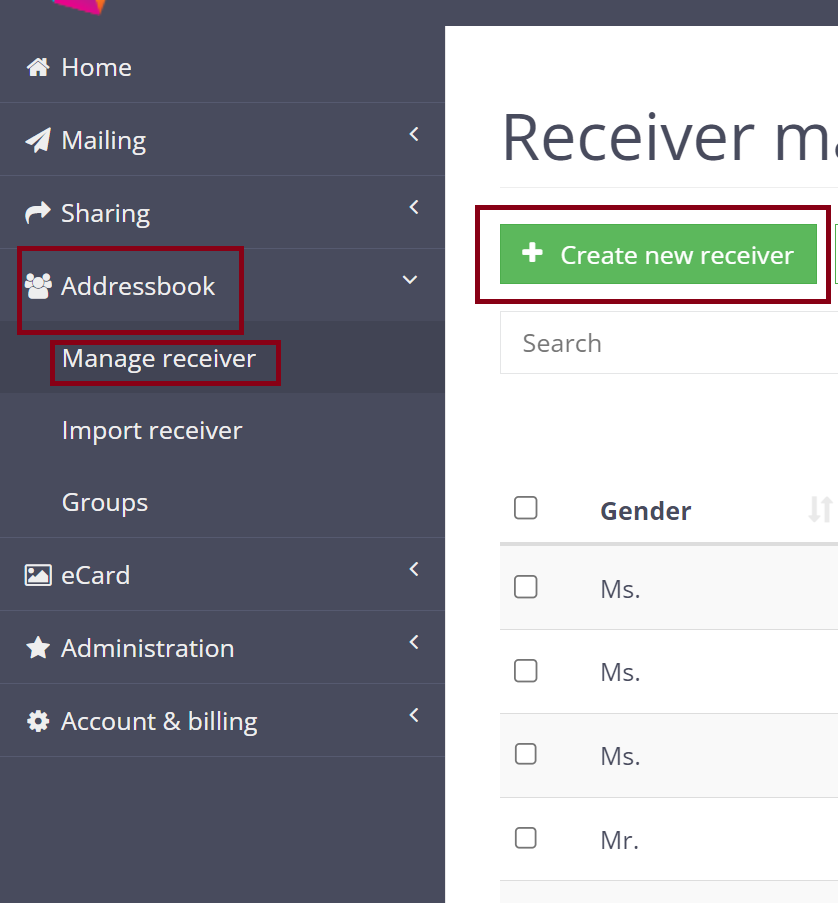
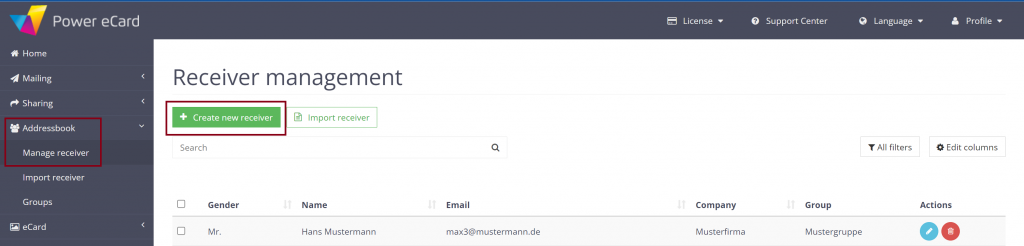
To send a mailing or serial mailing to a new employee, you first need to create them as a receiver in your address book. To do this, click on Address book>Manage receivers>Create new receiver in the menu.
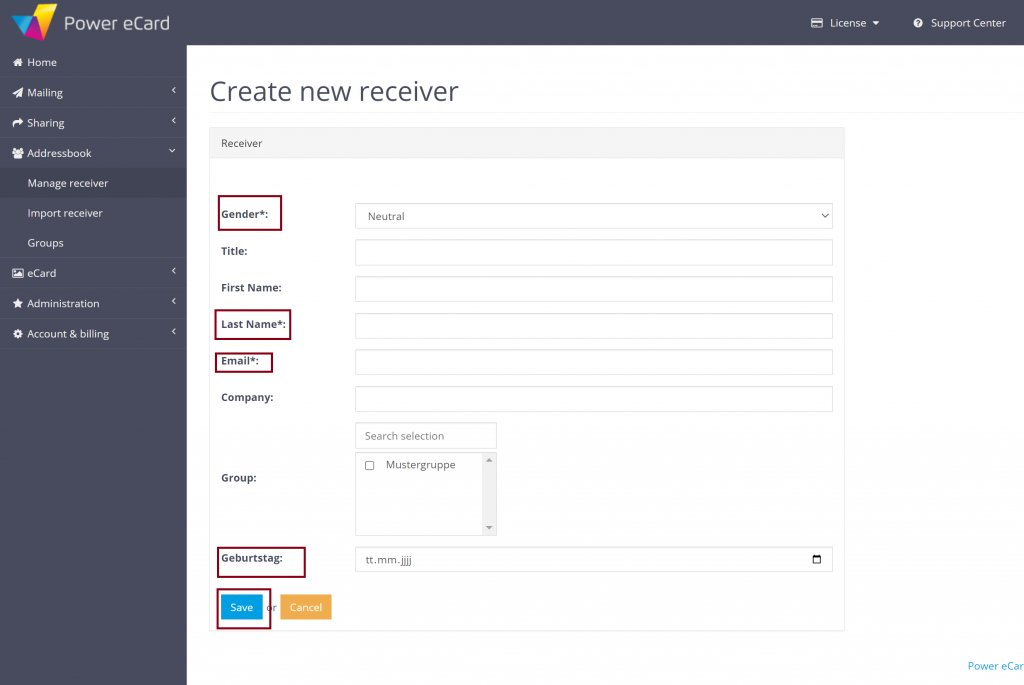
You now have the option of entering the new employee’s personal data.
Important: Be sure to fill in the receiver field, which determines the mailing date of the serial mailing for the individual employees. For example: If you are dealing with birthday cards, the birthday field must be filled in for each receiver. Then save your details.
Step 2: Add employees to the serial mailing
Once the new employee has been created in the address book, you can now add them to the existing serial mailing. To do this, click on the blue pencil icon of the respective serial mailing in the menu under Mailing>View mailing overview.
You will now be automatically taken back to the serial mailing creation process.
If you want to keep the same eCard design, simply click on Proceed to next step to the next step.

The original selection of receivers is already highlighted in blue here. Now tick the box to the left of the receiver name of your new employee.
If the new employee is also highlighted in blue, you can now follow the mailing process as described in step 2 Create serial mailing. As only the receivers will be adjusted in this example, click on Next until you reach the overview page for serial mailings and confirm all the changes you have made by clicking on Create serial mailing.
The new employee has now been successfully added to the existing serial mailing.