You can create user groups to give selected users access to specific eCards. This allows, for example, different departments or individuals such as your management to have exclusive access to cards selected for them.
This guide uses common use cases to show you how to create user groups, assign them individually or define them centrally during the import of a user list.
1. Create User Groups
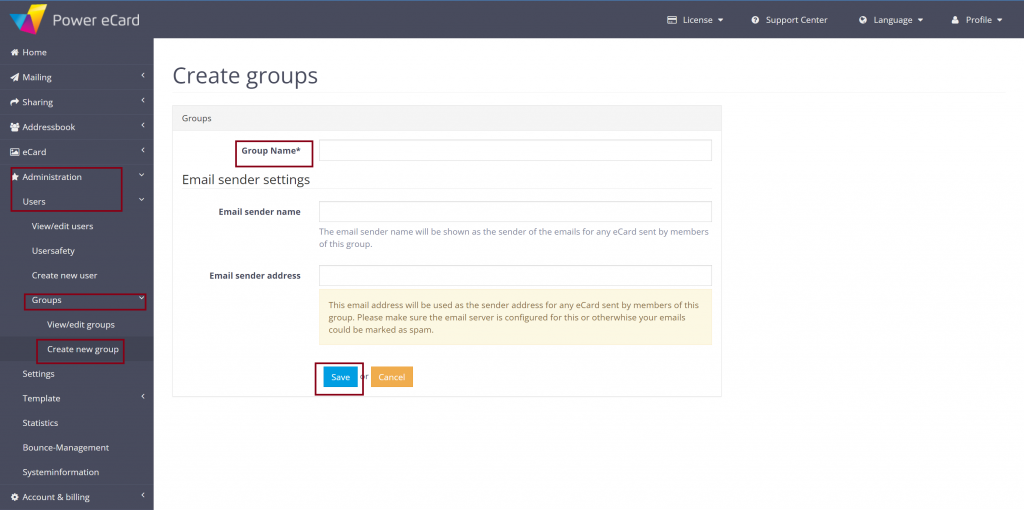
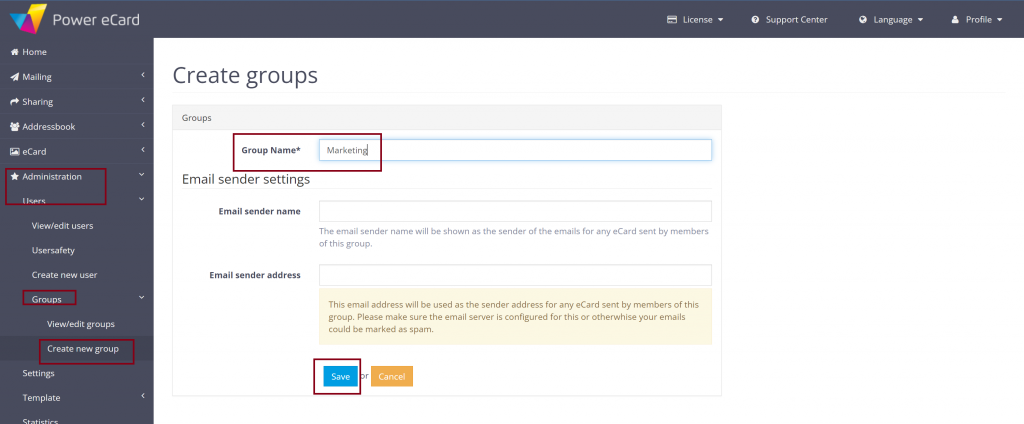
The first step is always to create a new user group. To do this, click on Administration>Users>Groups>Create new group in the menu.
Only the group name* is mandatory among the fields displayed. Optionally, you can specify that all future members of the group use the same Email sender address or the same Email sender name.
2. Assign users to a user group
Option A: Assign users individually to a group
Once you have created a group, you can now assign receivers to this group. For individual or a small number of receivers, it is sufficient to assign them manually to their respective groups in the user administration.
To do this, click on Administration>Users>View/edit users in the menu. You can edit the corresponding user data by clicking on the blue pencil next to each user.
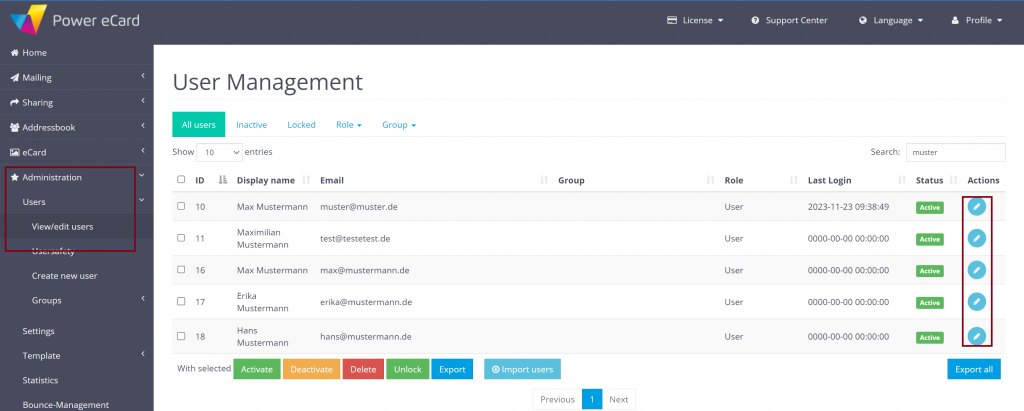
In the Group field, you can now select the previously created user group via dropdown and save your changes.

Option B: Assign user list (Excel, CSV) to one or more groups
When importing your users, you have the option of assigning them to one or more groups.
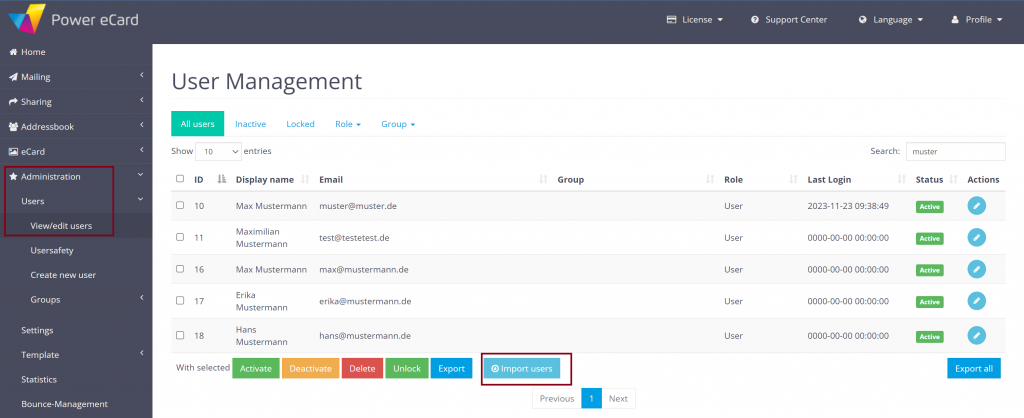
To do this, go to Administration > Users > View/edit users In the menu on the bottom right, click on Import users.
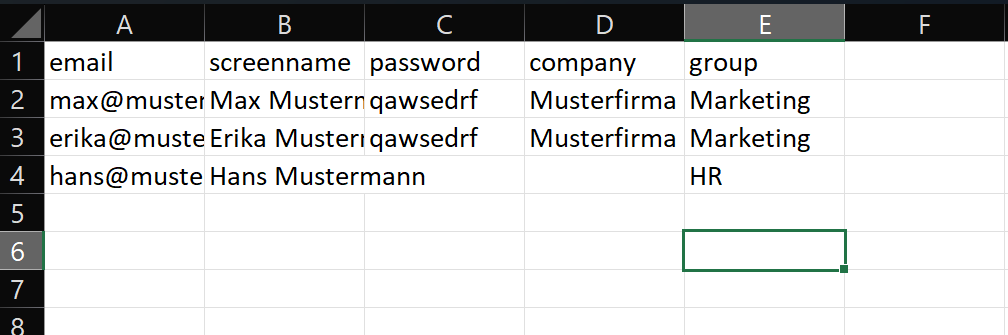
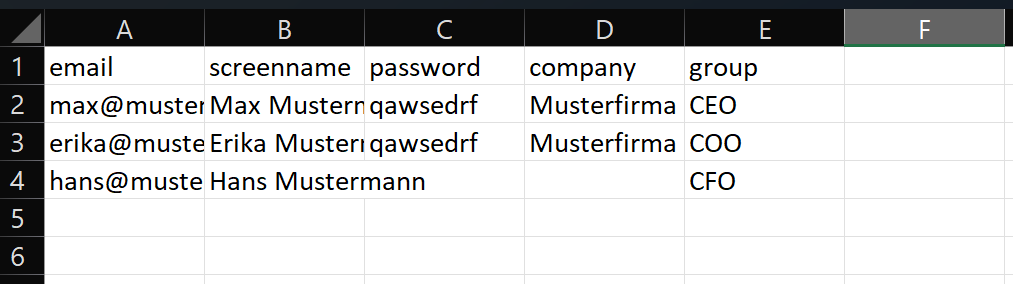
There you can download a user file in which you can enter your users by clicking on Format. This sample file follows the structure:
email;screenname;password;company;group;
[email protected];Max Mustermann;qawsedrf;Musterfirma;group-unit;
[email protected];Erika Mustermann;qawsedrf;Musterfirma;group-unit;
[email protected];Hans Mustermann;;;group-unit;
You can use the predefined names and data as a guide and fill in the table accordingly with your own users.
In the “group” column, you now have the option of entering the name of the user group that you have previously created in the system.
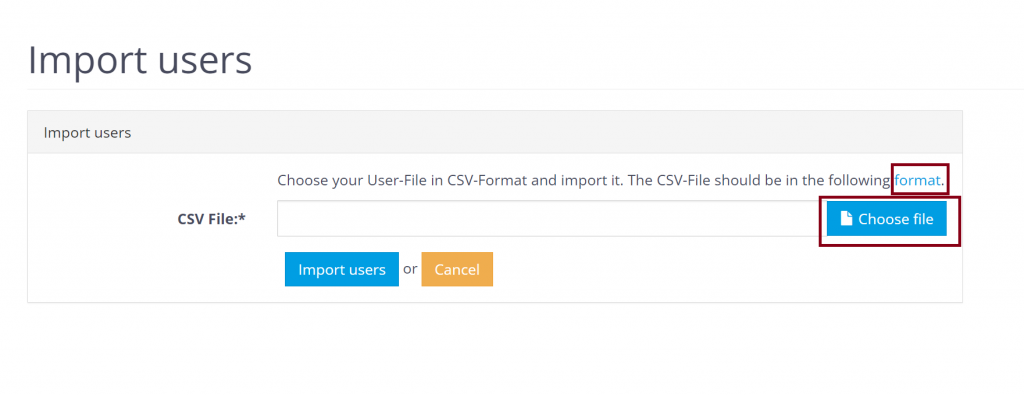
Once you have entered your users in the sample file, you can start the import. Upload your prepared import file by clicking on Choose file and then click on Import users.
You will now see a notification about the successful import above the user administration. In the Group column, you should now be able to see which group your new users have been assigned to.

Option C: Automatic group assignment for self-registration
It is possible to automatically assign users to a! group when they register, simply add “#Group name” after the defined email domain under Administration>Settings>Users & Security > Allowed email domain.
Replace “Groupname” with the name of the group to which the users should be added. The group must already be created in the system.
You can find more information on user registration in this article.
Assign eCard to the user group
Once you have created a user group and assigned users to this group, you only need to assign your eCard to this specific group. This means that only the users in the assigned group can see and send the relevant eCard.
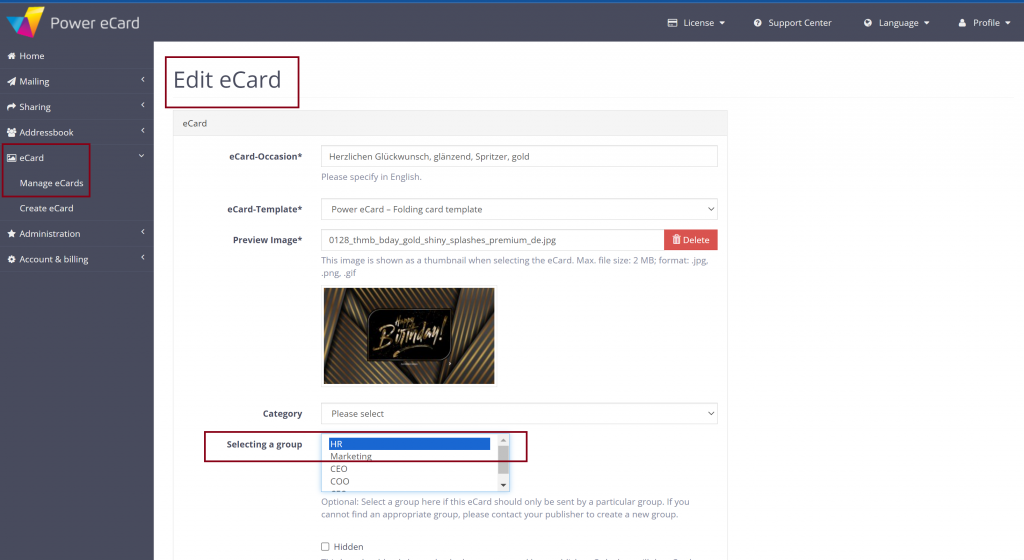
To do this, go to the editing mode of your desired eCard and click on Edit settings.

Scroll down and you will now find the field Selecting a group in which you can select the user group(s) that should be authorised to send the eCard.

Once you have selected a user group and saved the changes, the card is now only accessible to members of this group (with the exception of administrators).
Practical example department/management
1. Create New User Group by Department/Title
The first step is to create a separate user group for each department that requires exclusive access to a card. To do this, click on Administration>Users>Groups>Create new group in the menu.
Of the fields now displayed, only the group name* is a mandatory field. Optionally, you can specify that all future members of the group have the same Email sender address or the same Email sender name.
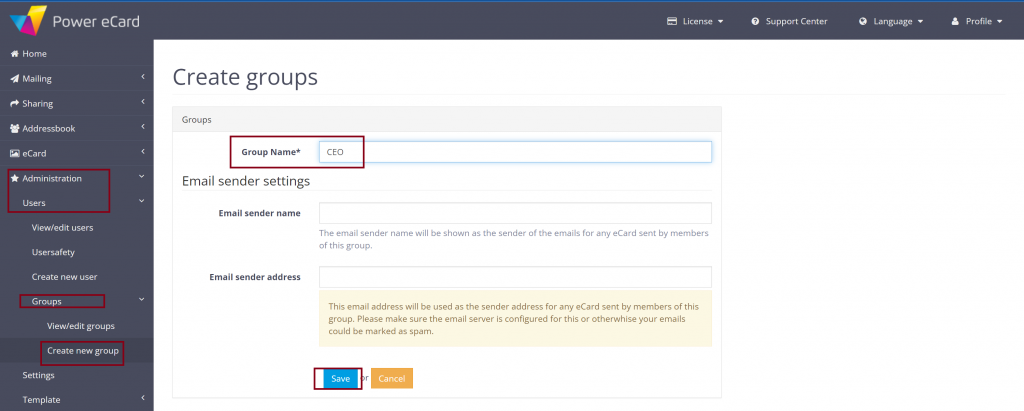
In the case of your management, create a group with the title or name of the person. The purpose of this group is to assign only one user (for example your CEO) in the next step so that only this user can send the corresponding card.
2. Assign Employees to the User Groups
In the next step, assign the appropriate users to your groups. In this example, new users are uploaded via a user list. To add users manually, see option 1 above: Assigning users individually to a group
In order to optimally divide your users into departments, the corresponding department should already be defined in the form of a suitable group when importing the users.
To do this, follow the steps listed in the Assign user list (Excel, CSV) to a group(s) section and enter the department names (e.g. Marketing or HR) in the group column.
When it comes to special cards that are to be assigned to a single person, you can enter the title or name of the respective user as the group (e.g. CEO, COO or CFO). If the user group only has one member, this ensures that only the assigned user can send the corresponding card.
Once you have entered your users in the list, you can start the import. Upload your previously prepared import file by clicking on Choose file and then click on Import users. The users are now uploaded to your system and automatically assigned to the previously created groups.
3. Assign eCard to the User Group
The user groups have been created and have all the required members. Now you just need to assign your eCard to the corresponding user group. In this way, only the users of this assigned group can view and send the relevant eCard.
To do this, click on Edit settings in the editing mode of the corresponding eCard.

Under Selecting a group, you now have the option of selecting one or more user groups and saving your changes.
You have now ensured that only the users in the selected group can view and send this eCard.