General settings
Before you are able to send your eCards, they have to be created first.
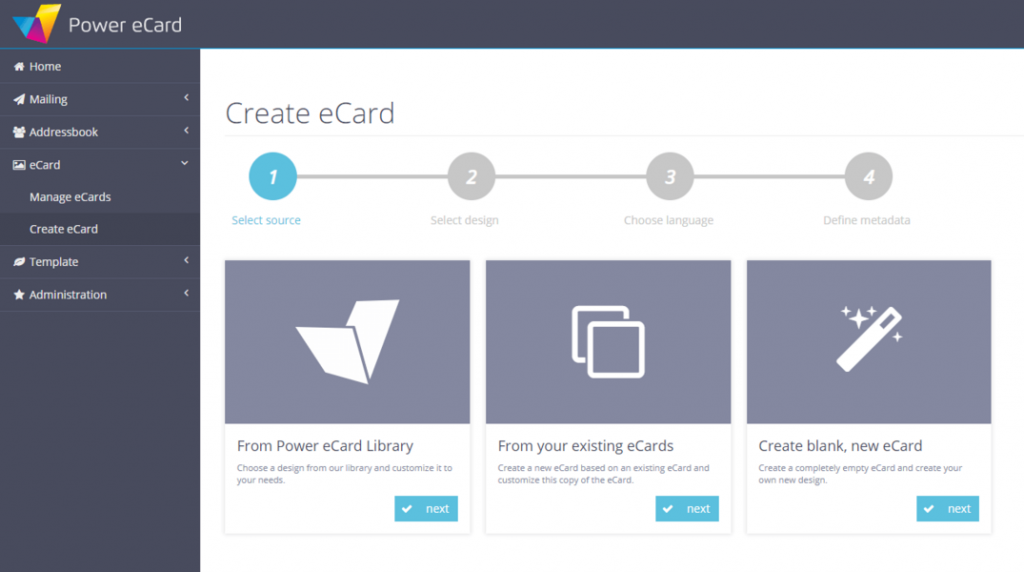
To create a new eCard please select eCard > Create eCard in the main menu.
1. Select source
In the first step you have the choice to pick a free template from the gallery, duplicate an already created map, or create a completely new map.
You can design and customize both the eCard itself and the email with which it arrives at the recipient completely on your own terms, even if you choose a pre-made motif as a base.
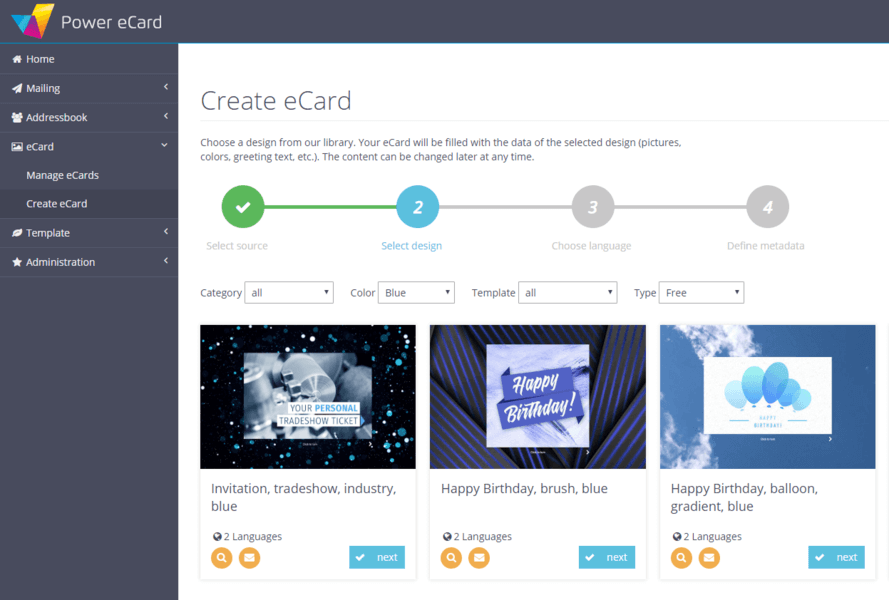
2. Choose a design
Option A: From Power eCard Library
Video Tutorial
Our library contains a large number of prepared motifs, which you can individualise according to your wishes or simply adapt. If you decide to use an eCard from the gallery, you will find an overview of all free card motifs here. Various filters are available to make it easier for you to find the right card motifs.
You can view the card and the corresponding email using the two preview buttons and then confirm the selected motif by clicking on “continue”.
Option B: From your existing eCards
This option is useful for you if you have already produced eCards or designs in your system and need to duplicate and customize a card based on them. Instead of the cards from our library, the cards you have already added to your system are displayed here.
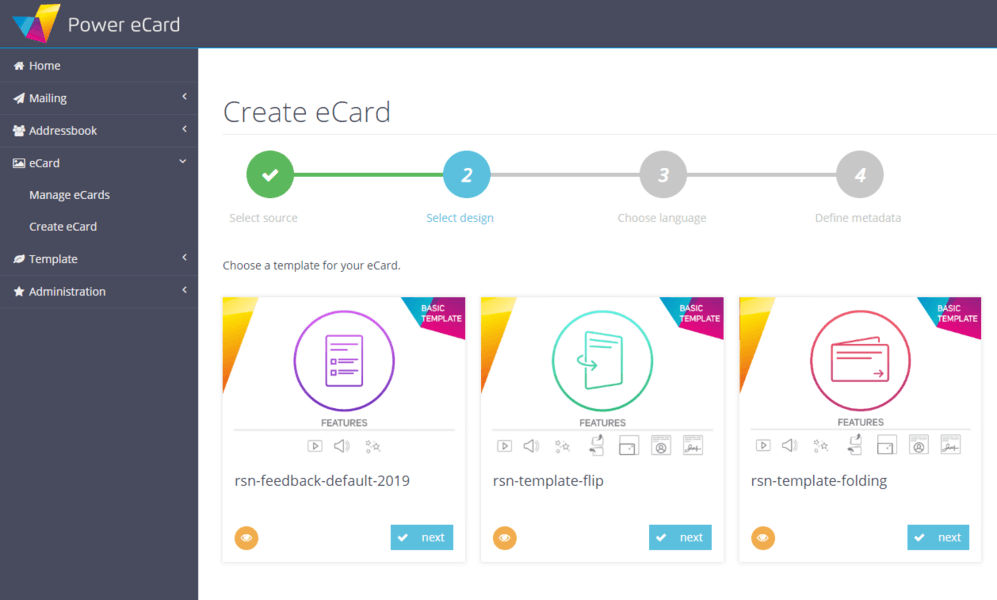
Option C: Create blank, new eCard
Video Tutorial
With this variant, you can create your personal eCard completely freely and without presettings. This is useful if you want to use an individual design that is not based on one of our templates.
In step 2, you can first select the card template that determines the basic structure and animation of your eCard. You have the possibility to view the individual templates and then confirm by clicking on “continue”.
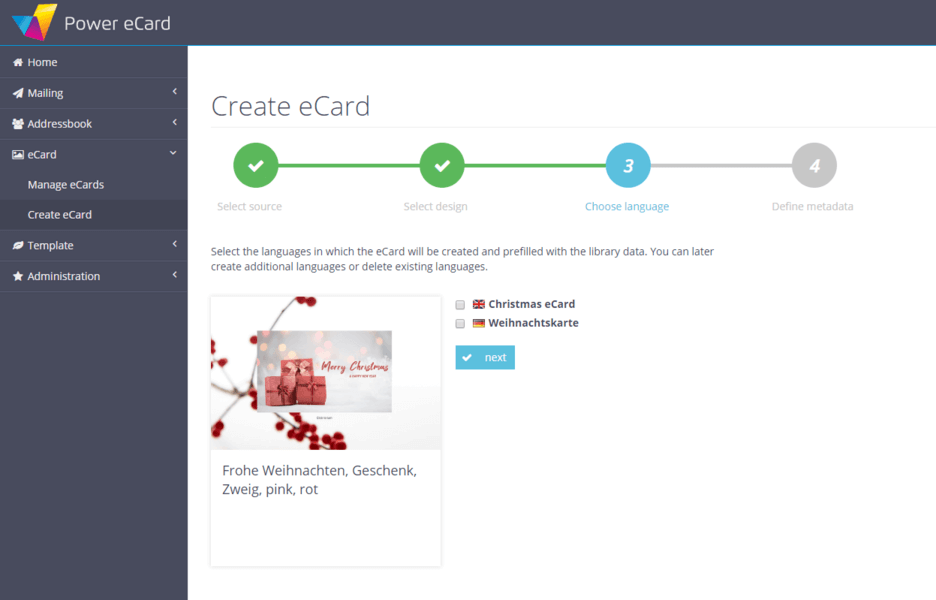
3. Select language
Once you have chosen a motif, you can select one or more language versions for the eCard. Our templates are available with German and English standard texts, but you can create any number of additional language versions of your card.
4. Define Metadata
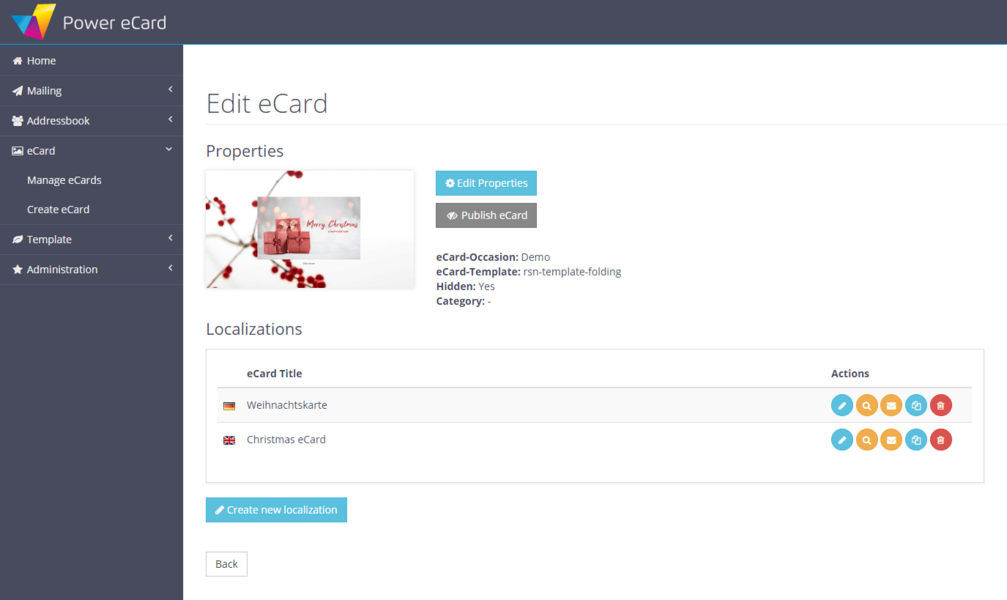
Localizations
Finally, you will be asked to assign a title for the eCard osscasion and can upload a new preview image if you do not want to use the one from the template. This will make it easier for you to identify this eCard later in the list of your cards during the mailing process.
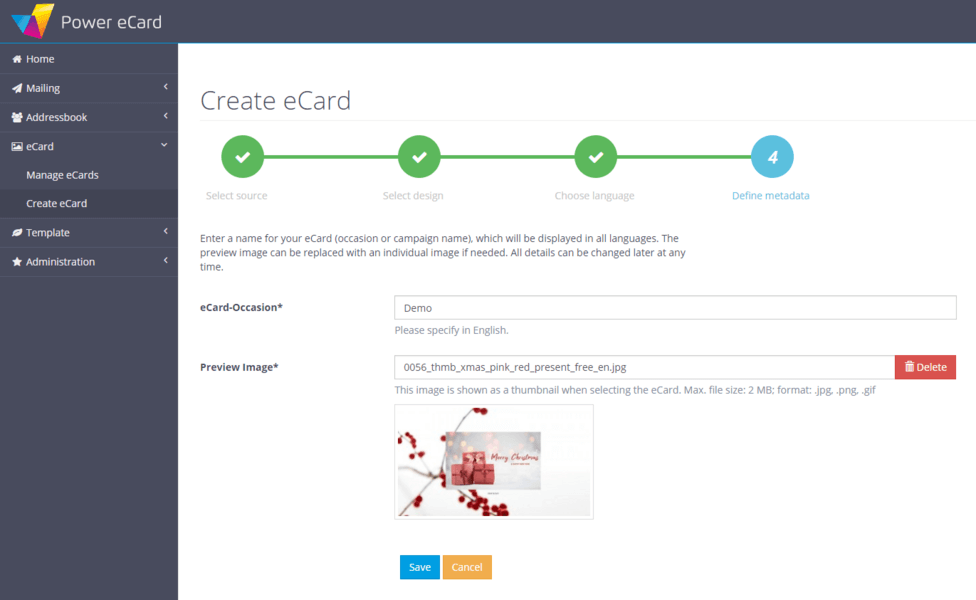
With a final click on “Save” you have completed the basic setup of your first eCard. Now the created localizations are displayed and you can take care of the actual design of your eCard. Each eCard can be customized individually for each language version.
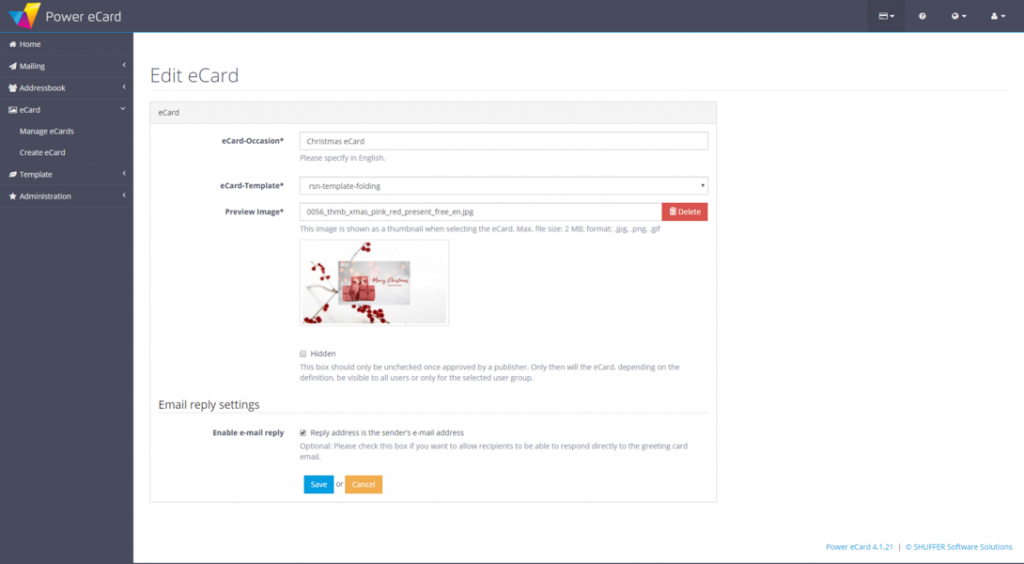
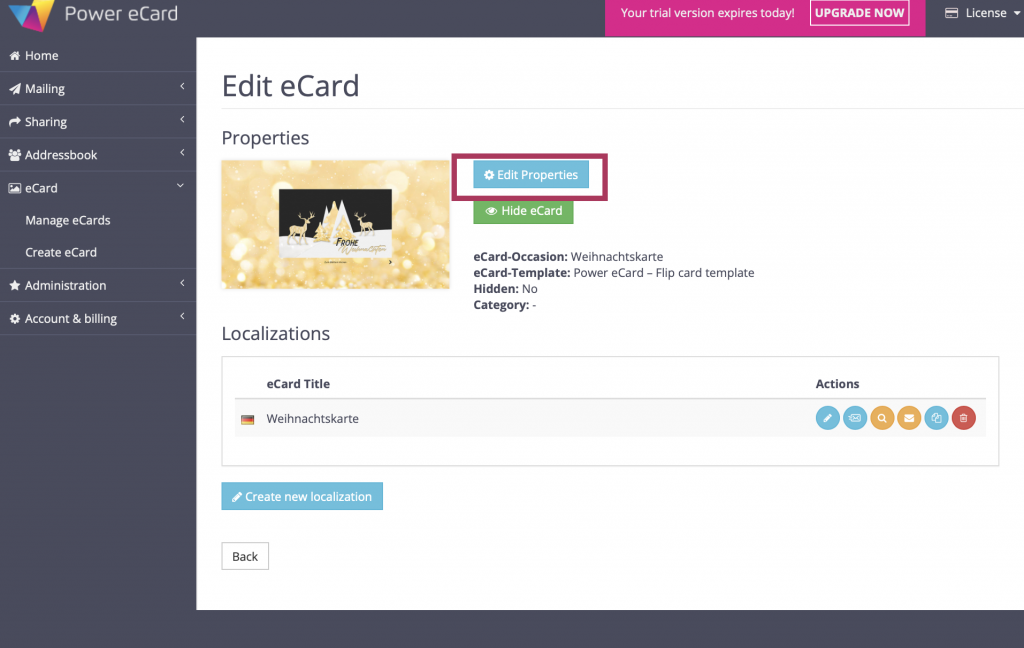
eCard properties
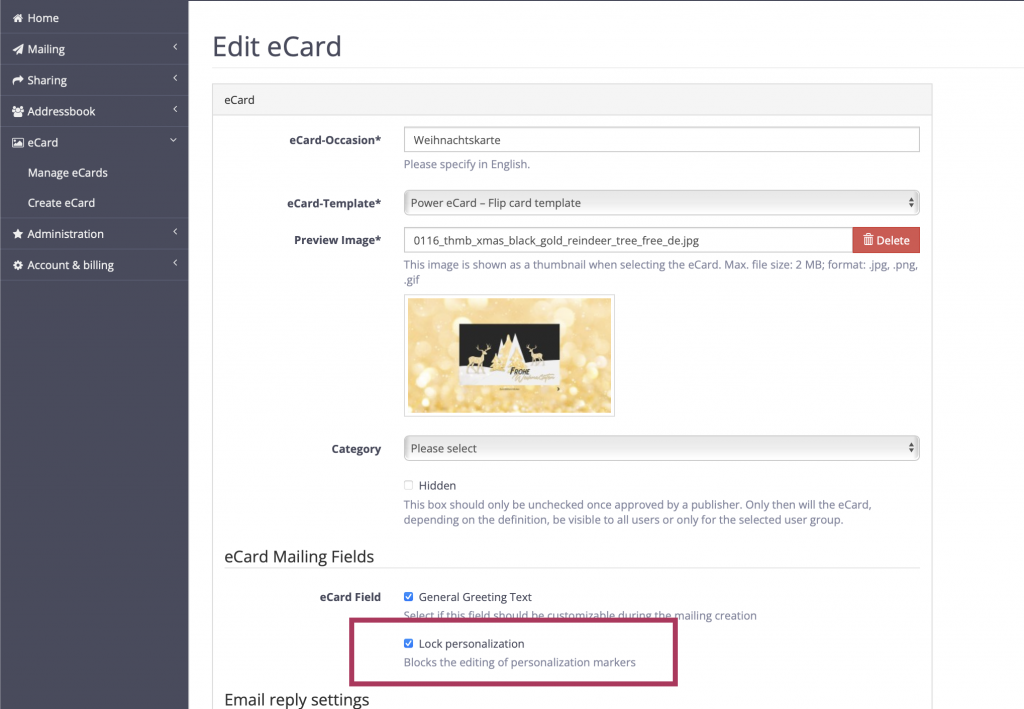
Basic properties and e-mail reply address
In the eCard properties, you can define the eCard reason, the template and the preview image as well as settings for sending e-mails. Here you can specify whether recipients can reply directly to your eCard e-mail. To do this, check the box for “Enable e-mail reply”.
Lock personalizations
If the eCard created by admins should not be changed by regular users, you can also prevent this in the eCard properties of your card with the Lock personalization feature.
There you set a check mark at Lock personalization, so that normal users can no longer change the eCard greeting texts. For admins this is still possible.
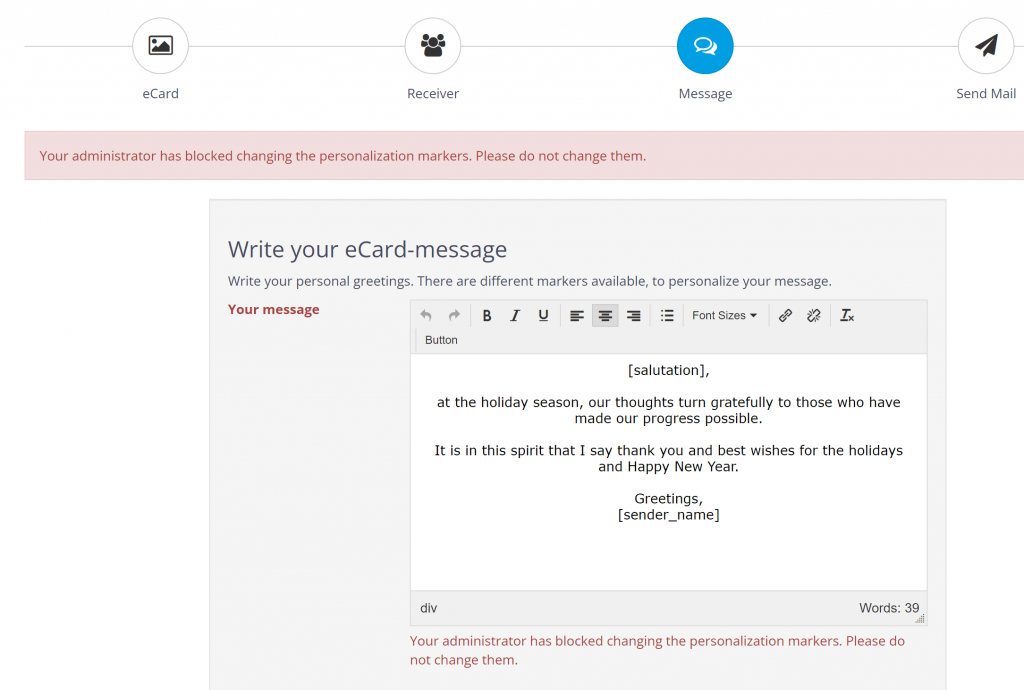
If a user tries to change the eCard greeting text even though it is blocked, the following message will be displayed in the next step: Your administrator has blocked changing the personalisation markers. Please do not change them.
Edit localizations
If you have selected a card from the gallery, then your card is already prefilled with data of the selected design (pictures, texts, colors).
If you have created your card based on one of your existing motifs, then your motif is filled with the ame data as the original eCard. This is a copy of the original data, the original design from which the card was created will not be changed!
If you have selected a new, empty eCard, then your motif is filled with sample data (demo images and dummy texts).
You can use the yellow icons in the “Actions” column to preview the eCard and the email that the recipient receives.
You can now use the blue pencil icon to edit all details of the particular language version of your eCard.
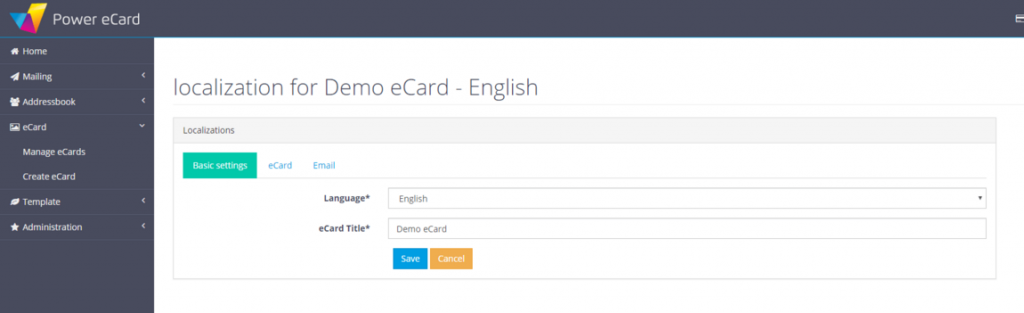
1. Basic settings
In this tab you can change the language and title of your eCard. The title is used for recognition and is later visible to your recipient as a page title (at the top of the browser window).
2. Design your eCard
After you have made the basic settings, we will proceed with the actual shaping of your Power eCard.
Here you adjust the greeting text and the card layout to your personal wishes.
Edit Greetings
Video Tutorial
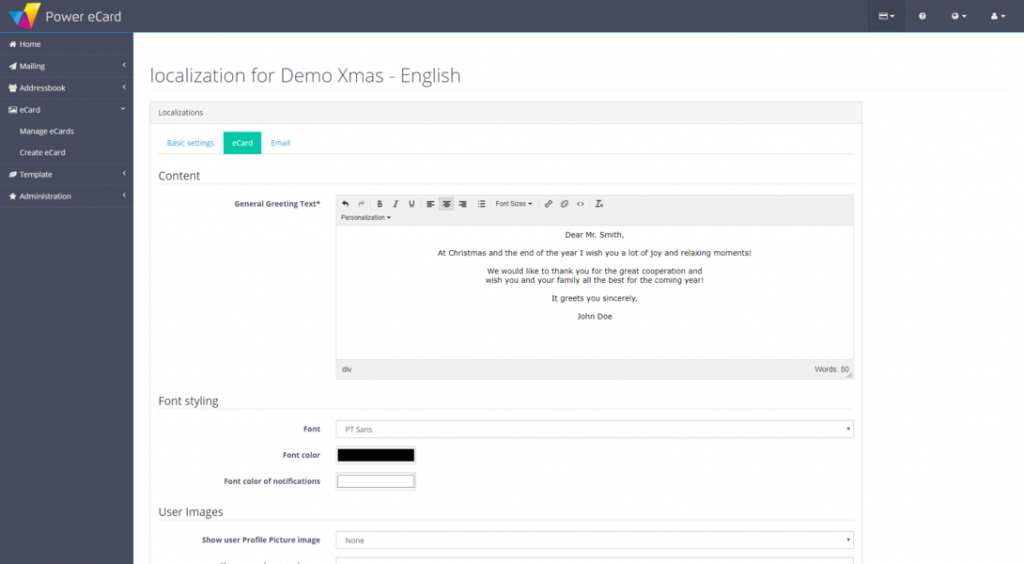
- Write a personal greeting text in the text editor.
- The Personalization button in the Text Editor allows you to specify the salutation and greeting phrase of your message by using different markers.
- Specify the font and color of the text.
- If you like, place your profile picture and signature on the eCard.
Define eCard layout
Video Tutorial
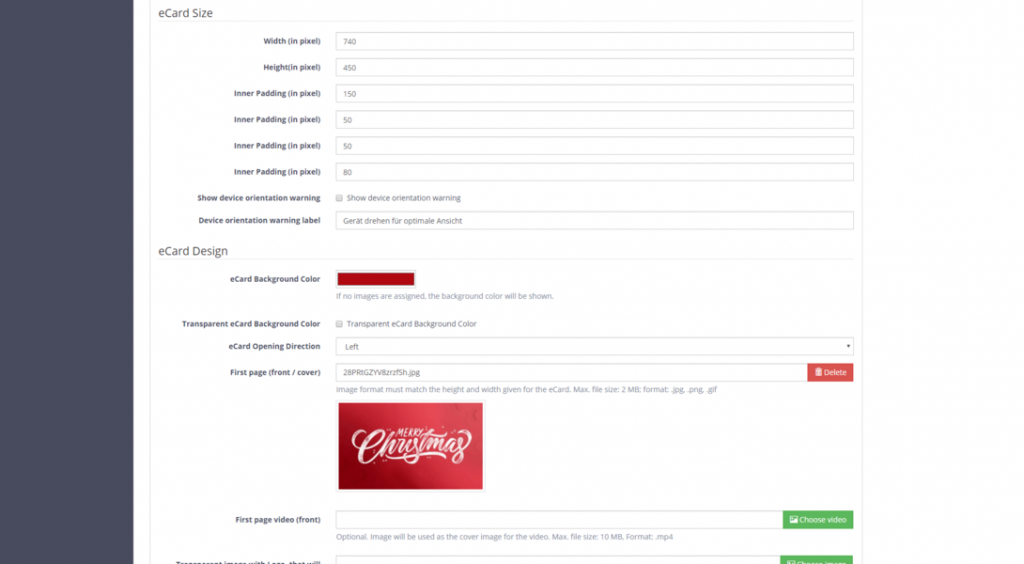
- Design your page background with a picture, video or just add a color.
- Determine the size of your eCard and the distance between the text and the border of the card.
- Upload a graphic for each side of the card. Alternatively, you can specify a background color.
- Set the folding or rotation direction of the Power eCard.
- Optionally add animation effects.
- If necessary, change the navigation elements and labels for scrolling the card.
3. Design the email
At the end you edit the e-mail with which your Power eCard will arrive. Here you can personalize the e-mail text and have various options for customizing the appearance of the e-mail.
Edit email text
Video Tutorial
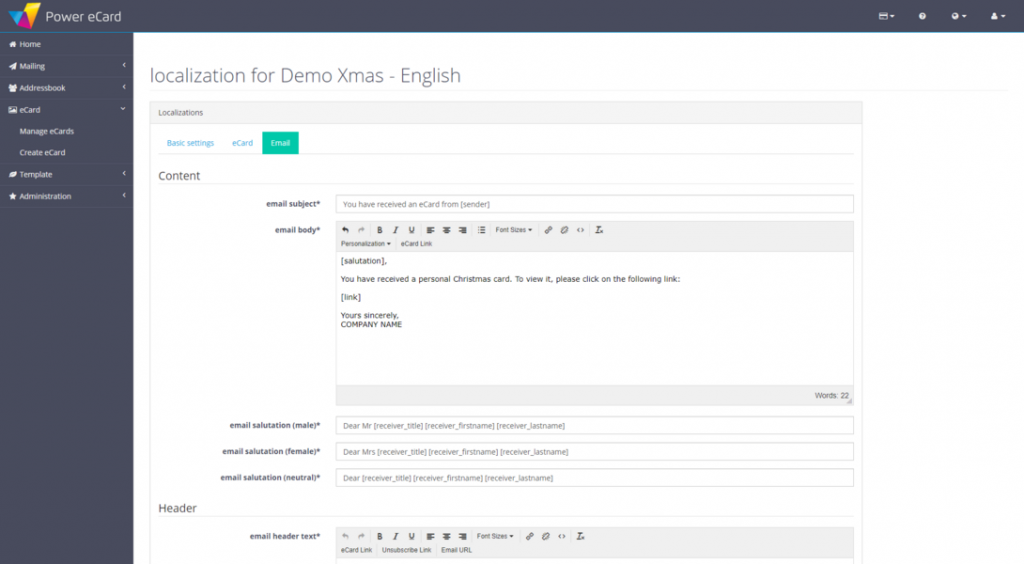
- Write your personal email text and subject.
- Here you can also specify the salutation using the personalization button with the help of the markers.
- You can optionally add a footer text that appears below the e-mail.
Define email layout
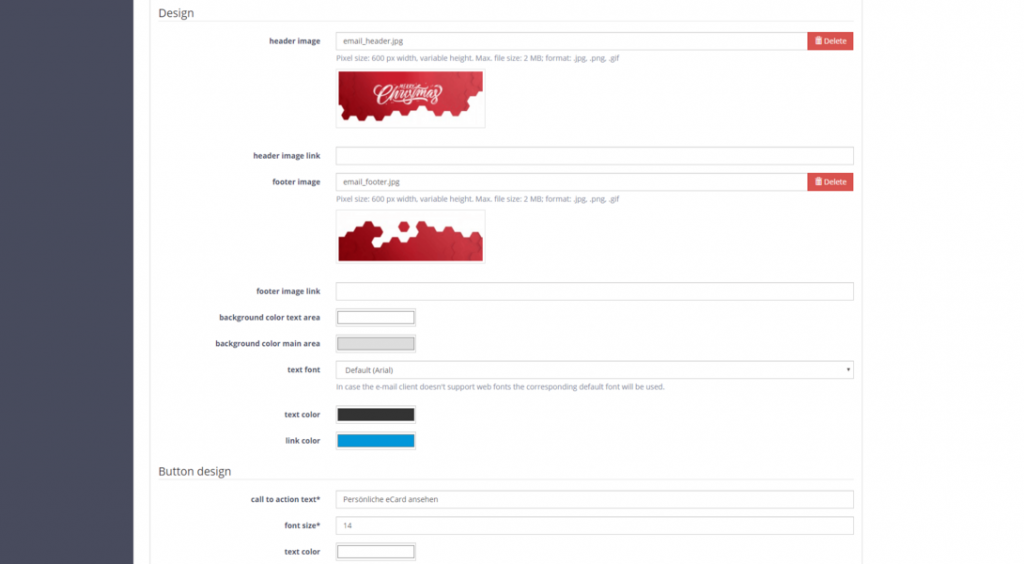
- Insert an image in the header and footer of the mail. These can also be equipped with links. The optimal image width for header and footer is 600px.
- Set the background color of the text and outside area, as well as the text color and font.
- Label the link button.
- Choose your button design by specifying the font size, text and background color, shape and frame of the button.
Done – your Power eCard is now ready for use!
If you now save your settings, you will return to the overview of the localizations of your Power eCard. Here you have the possibility to preview your eCard again.
When everything fits, your new Power eCard is ready for mailing!