Video Tutorial
Step-by-Step Text Guide
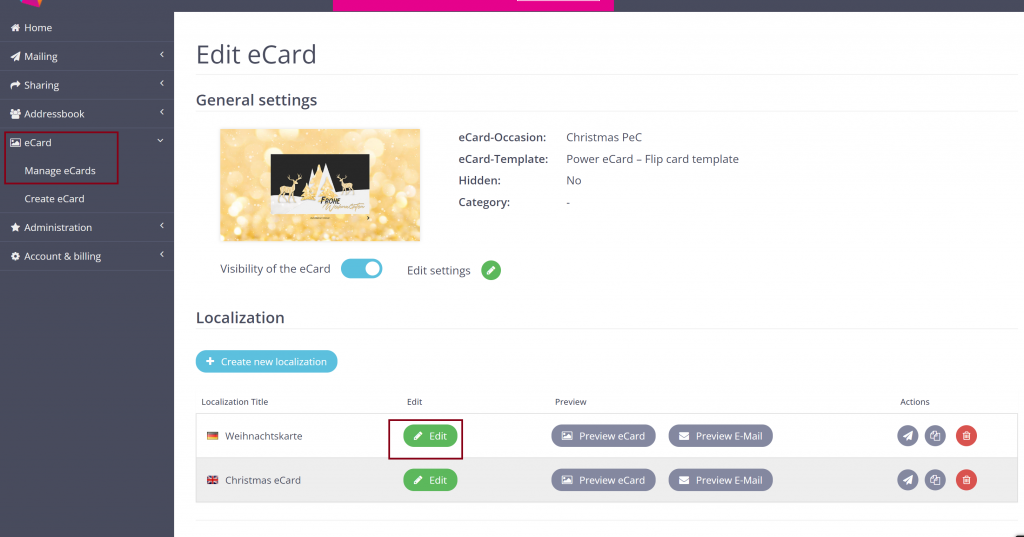
1. Open eCard editing mode
If you want to integrate your company logo into the eCard (e.g. on the cover), first go to the eCard editing mode.
This is how you reach it:
eCard > Manage eCards > Select eCard (click on blue pen icon) > Edit (Click on the green pen)

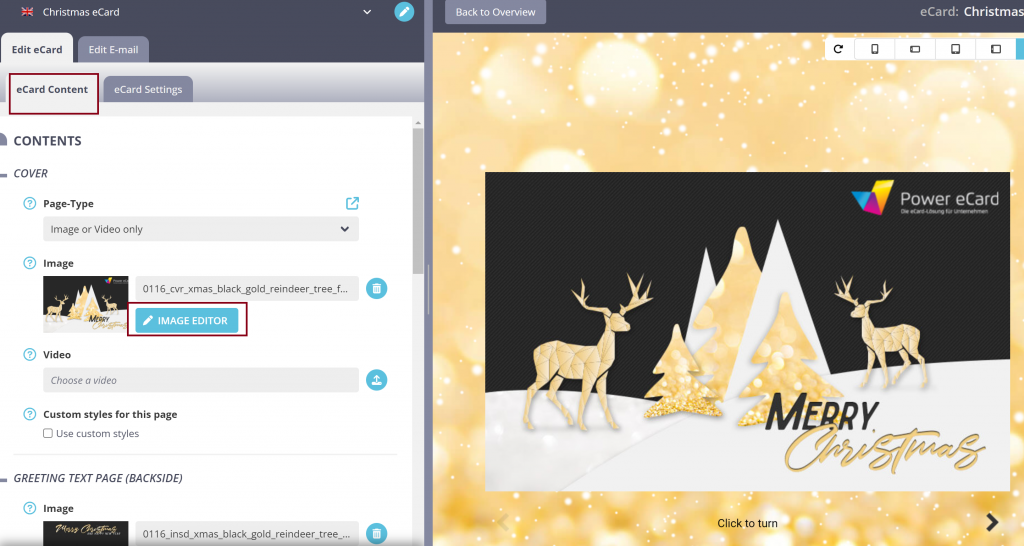
2. Open Editor
In the next step, scroll down the eCard Content page to the image on which you want to place your company logo. Directly below, click on the button IMAGE EDITOR.

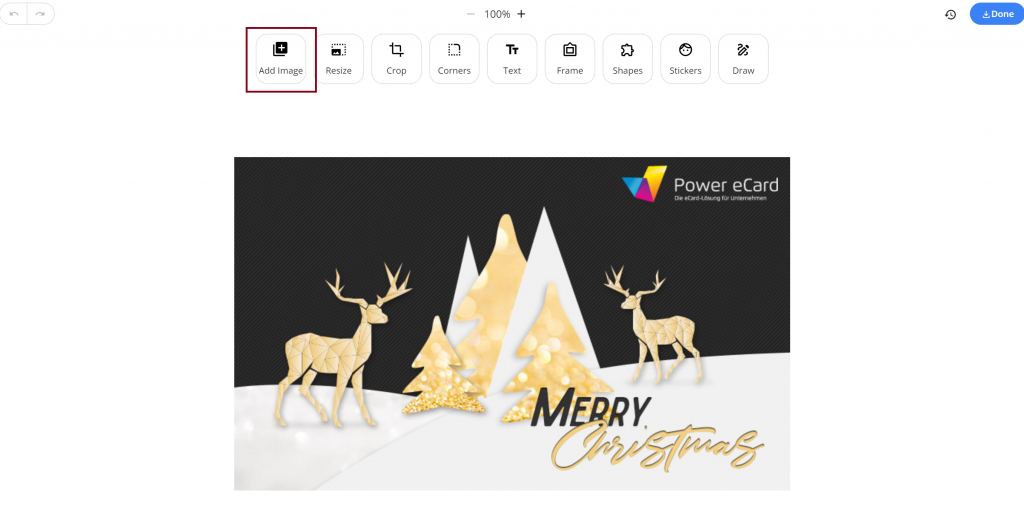
3. Select and place logo
Now click on Add Image in the upper menu and select your logo. Place it at the desired position on your eCard. Use the circles at the edges to make the logo larger or smaller.
Choose a logo in PNG format (without background). This will ensure that there are no unpleasant edges.

Tip: For a detailed tutorial on designing your eCard, you can follow our guide: How to design your first eCard with the Live Editor [2024].

