Full video tutorial
Text Tutorials
Option 1: Generate signature from profile
1. Add a signature to your profile
If you want to add your own signature to the system so that it appears on the eCard later, you can easily add it to your profile.
You can access your profile by clicking on the user icon in the top right-hand corner and then selecting “My Profile”. You will then see the following editing screen:
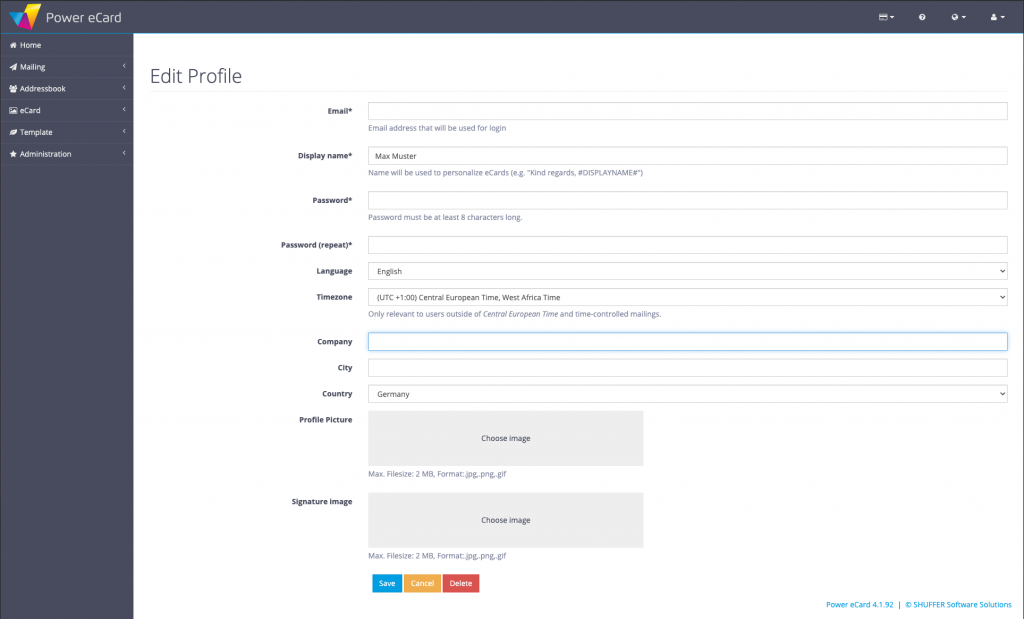
If you scroll down to the bottom, you will see the Signature area. Click here on the gray-shaded area with the label “Choose image”.
Please note the following when uploading your signature:
Possible formats: JPG, PNG
2. Display signature on your eCard
Once you have set your signature in your profile, you must enable it on the desired eCard in the next step.
To do this, go to your eCard administration and select the eCard for which the signature should be displayed. Click on Edit for the desired localisation and then go to the “eCard Content” tab. There you will find the section Signature of the user:
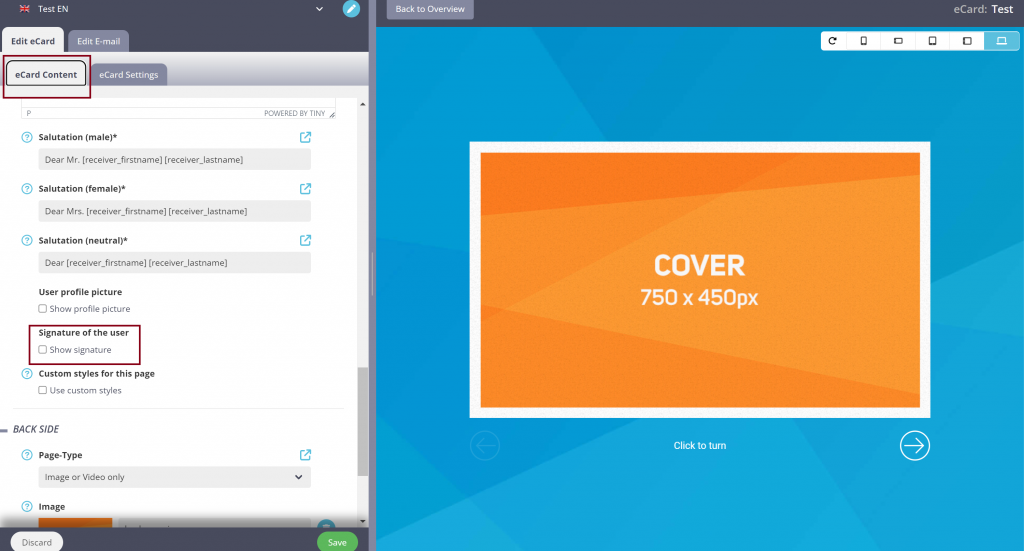
Under Show signature you can now allow your signature to be displayed on the eCard. The signature will then automatically be placed below your sender name on the greetings text page.
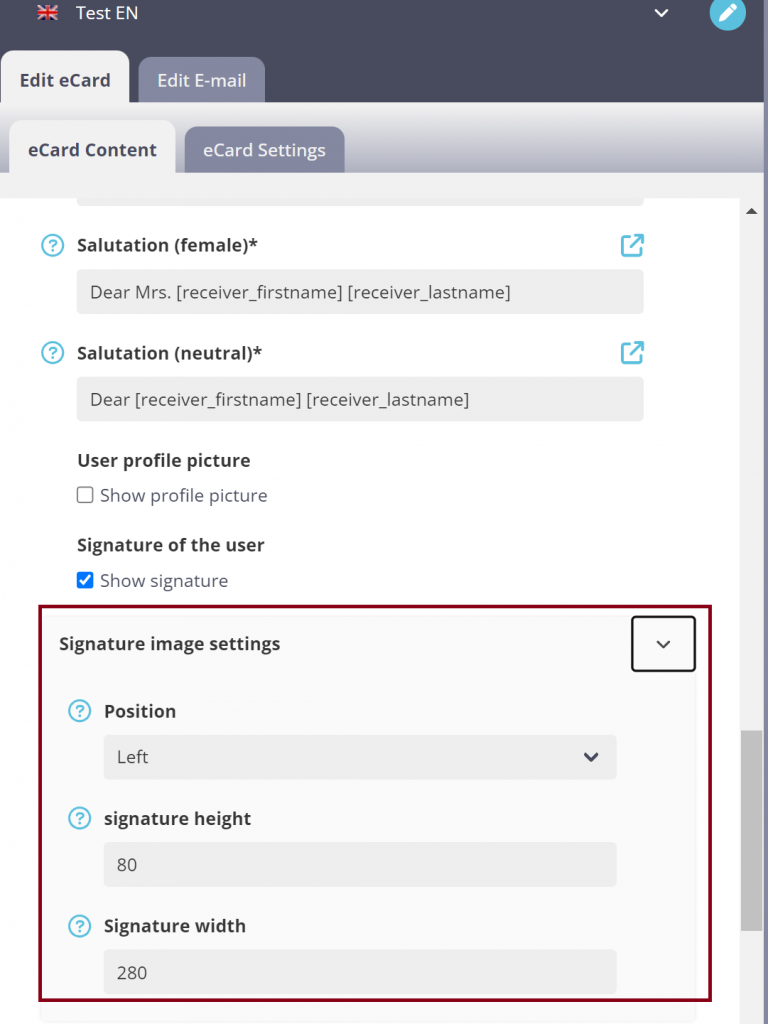
Signature Image Settings
Ticking the box opens the signature image settings, where you can make further design adjustments to the signature – including position, maximum height and maximum width.
Option 2: Set signature as overlay on eCard
If you want to place several signatures on an eCard or want a different “position” than the default position from option 1, you can use our image editor. You can use this to manually place your signature or signatures as an overlay in the desired position.
A. Open Editor
To do this, first go to the eCard editing mode under eCard > Manage eCards > Select eCard (click on the blue pencil icon) > Edit (click on the green pencil icon)
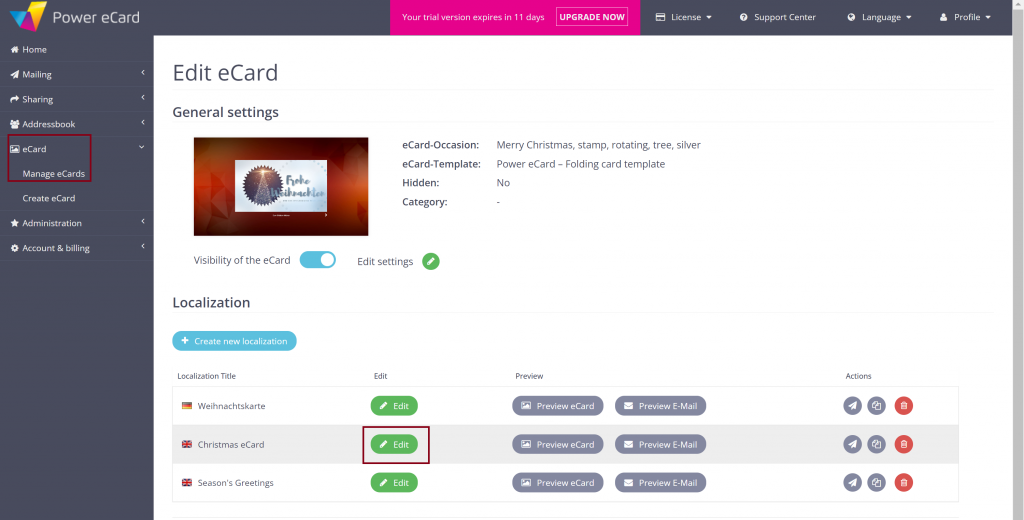
In the next step, in the Edit eCard>eCard content tab on this page, scroll down to the image on which you would like to place your signature. Click on the IMAGE EDITOR button directly below. In this example, we will place the signature on the righ inside and back side.

B. Place signature
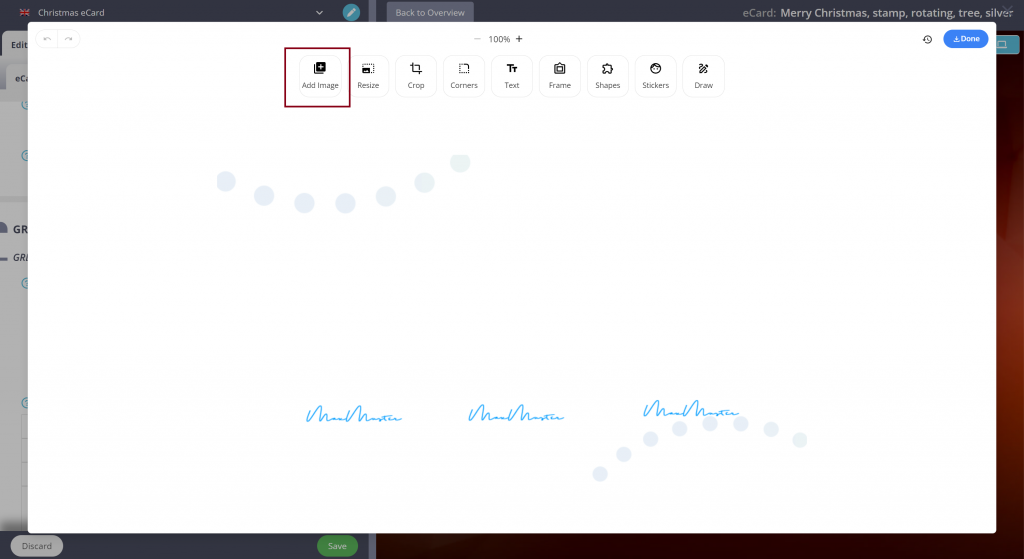
Now click on Add Image in the top menu, select your signature and upload it.

Once your signature is in the desired position, click Apply >Done in the top right-hand corner to exit the image editor.
C. Place additional Signatures
If you want to place more than one signature on a card, you can repeat the process described in points A. and B. and upload additional signatures as an overlay on your card background and move them to the correct position. All signatures can be “adjusted” one after the other so that signatures can also be added later. Finish the process by clicking on Done.
Option 3: Integrate signature in upload graphic
If you want to place one or more signatures anywhere on your eCard, but do not want to use our in-house editor, you can also place your signatures on the desired background image in your own graphics programme.
A. Place your own signature(s) on the eCard
With this option, you would place the desired signatures on the background image of your eCard yourself / in your own graphics programme. It is up to you whether you place the signatures on your own image or download a graphic from our library.
B. Upload eCard graphic including signatures
Once you have successfully placed the signature(s) on your graphic, you can upload it as the desired page in your eCard. To do this, go to the editing mode of your eCard under eCard > Manage eCards > Select eCard (click on the blue pencil icon) > Edit (click on the green pencil icon)

In the next step, in the Edit eCard>eCard content tab on this page, scroll down to the image on which you would like to place your signature. Click on the trash bin icon to delete the old image and you now have the option of uploading your new image including signatures.

You have now successfully uploaded a new background with signatures.


