You can send a test mail / test eCard at any time to check the eCard itself or its display. In this article you will learn how to send a test mail and how to determine its receivers.
Create receiver group for test mail
To send a test mail, a corresponding receiver group must first be created.
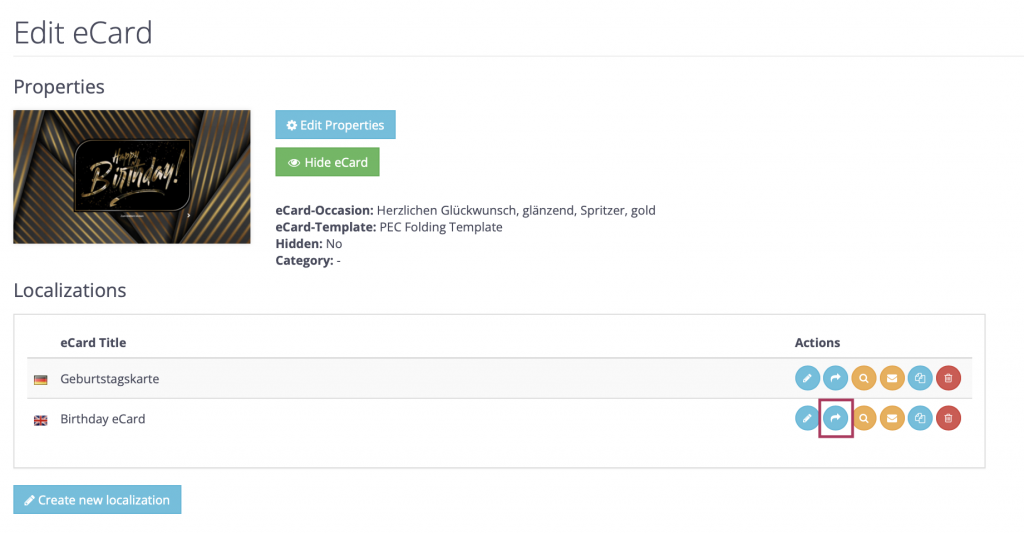
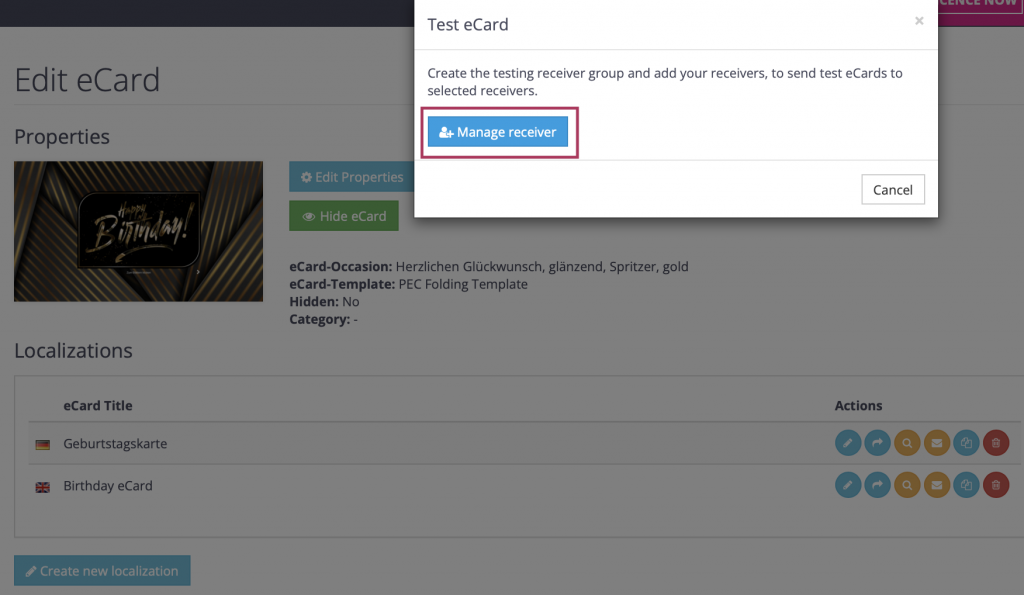
To do this, open the editing mode of your eCard motif and click on the button “Send Test eCard” in your desired language version.
If no receiver group with the name “pec-testing” has been created yet, you can create one in the now appearing window.
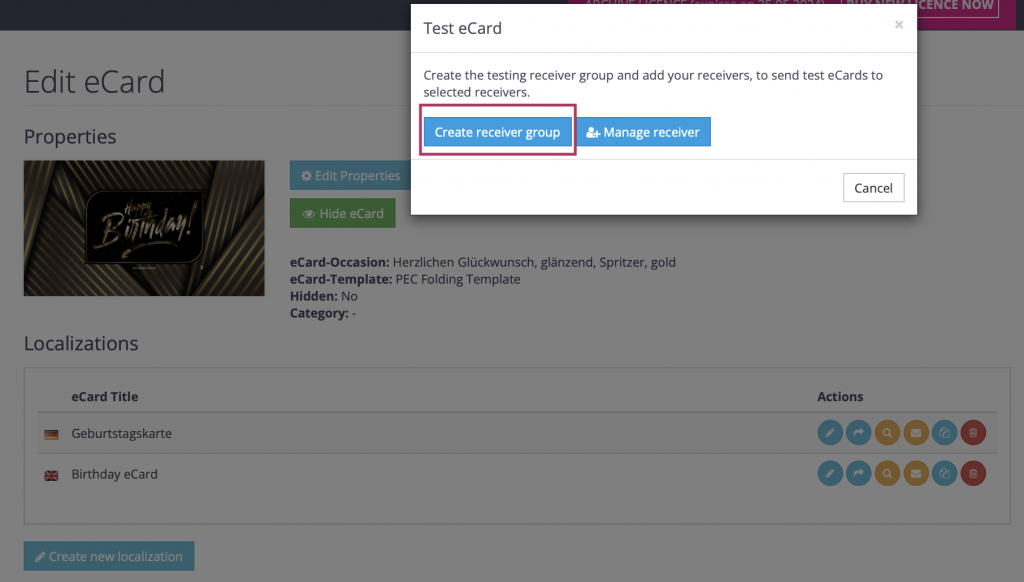
Click on “Create receiver group” to automatically generate a receiver group with the name “pec-testing”.
Alternatively, you can create the receiver group in the address book itself.
To do this, select in the menu Addressbook > Create new group
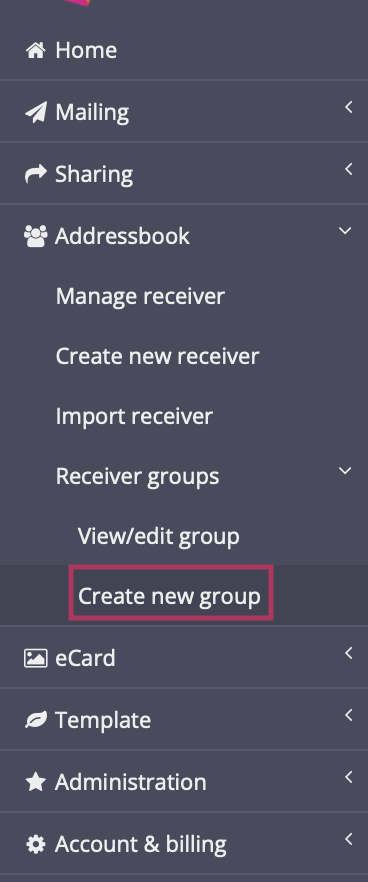
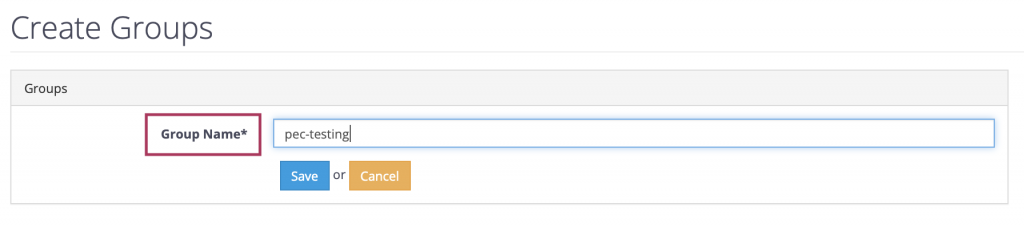
Enter the group name “pec-testing” in the field that now appears and save it. No other group name is permitted for the test mail function.
Add receivers to test mail group
In the next step, existing receivers must be assigned to the test mail group.
To do this, open the edit mode of your eCard motif again and click on the button “Send test eCard”. Now select the option “Manage receiver”.
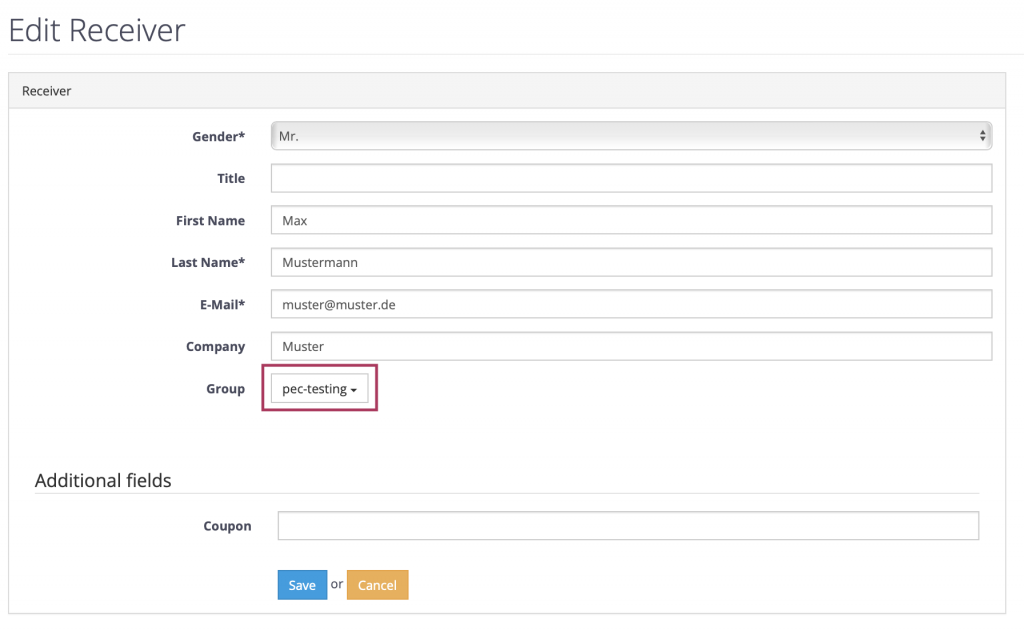
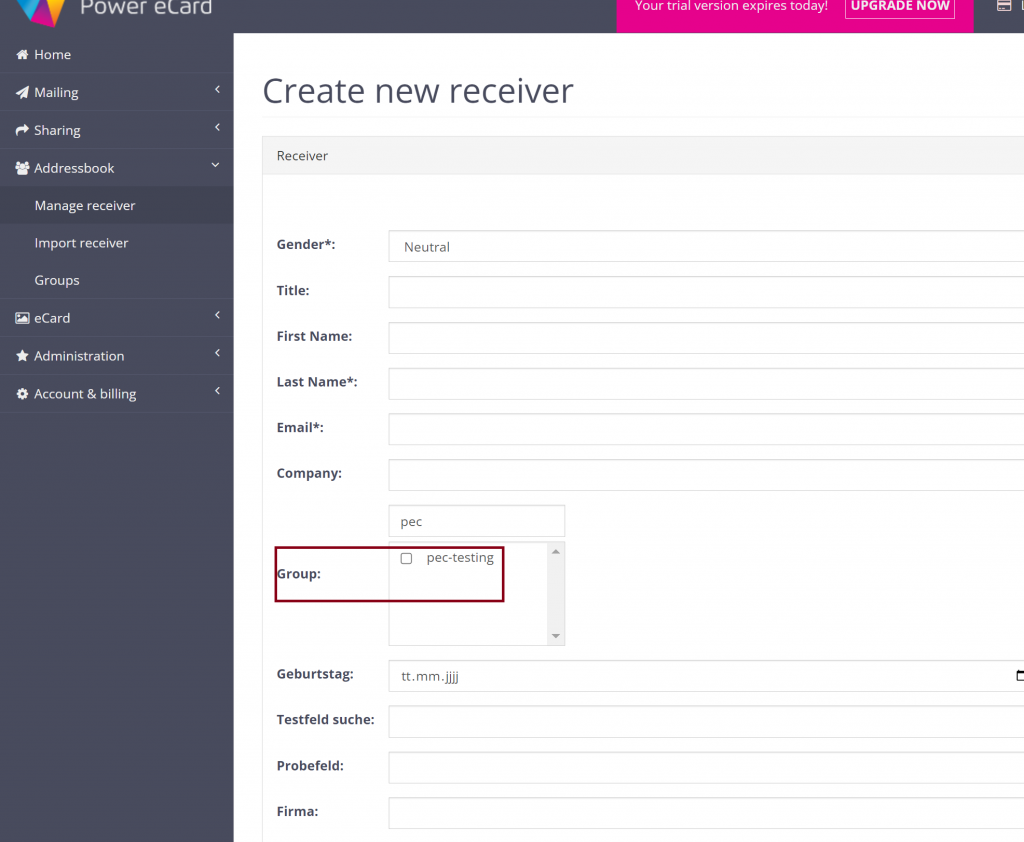
Now go to the edit mode of the desired receiver to change their assigned group.

You can now add the group “pec-testing” to the receiver’s groups and save the change. The receiver can now be selected for all future test mails.
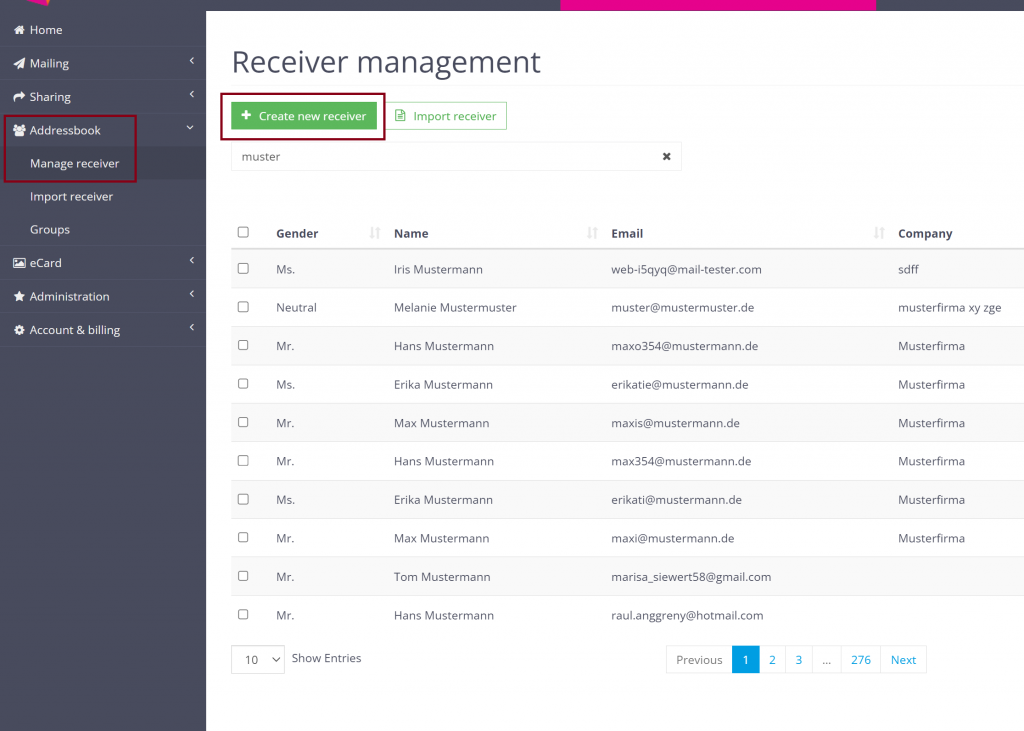
Alternatively, you can also manage the receivers via the address book. To do this, select in the menu Addressbook > Manage receiver
Create a new receiver and add them to the test mail group
If a non-existing receiver is to be sent a test mail, this receiver must first be “created”.
To do this, select in the menu Addressbook > Manage receivers >Create new receiver
Fill in the fields displayed and assign the group “pec-testing” to the new contact. Save your entries.
The receiver can now be selected for a test mailing at any time.
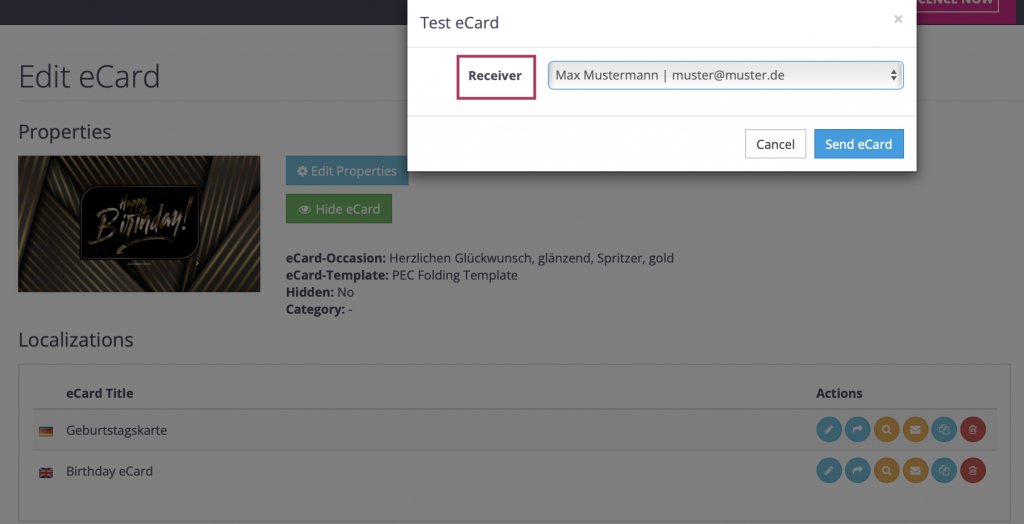
Send test mail / test eCard
Open the editing mode of your eCard motif and click on the button “Send test eCard” of your desired language version.

In the window that now appears, you can select a receiver for your test mail and send it.